
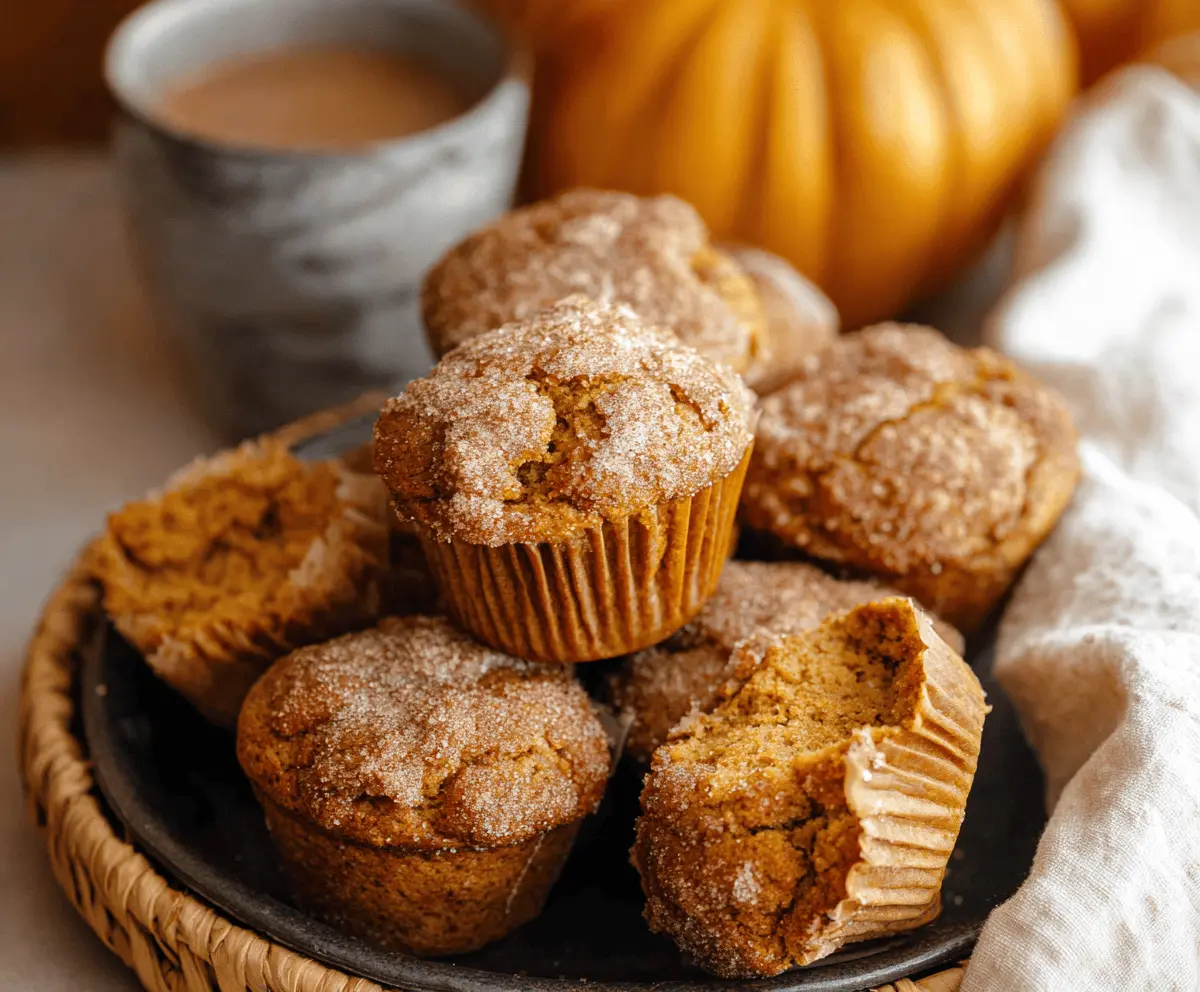
These Pumpkin Sour Cream Muffins are fluffy and packed with pumpkin spice goodness. The addition of sour cream makes them extra moist and delicious!
They’re perfect for breakfast or a cozy snack. I love grabbing one with my morning coffee—such a treat! Plus, your kitchen will smell amazing while they bake. 🎃
Key Ingredients & Substitutions
All-Purpose Flour: This is the base of the muffins. If you need a gluten-free option, you can try a 1:1 gluten-free flour blend. My personal favorite is almond flour for a nutty flavor, but remember, it may change the texture a bit.
Pumpkin Puree: Always use canned pumpkin puree, not pumpkin pie filling, as the latter has added sugars and spices. If fresh pumpkin is available, you can cook and puree it yourself, which adds a lovely depth of flavor!
Sour Cream: This adds moisture and richness. You can substitute it with plain yogurt for a lighter option, or even buttermilk if you want a slight tang.
Vegetable Oil: I prefer using canola oil, but you can use melted coconut oil or even unsweetened applesauce for a healthier take.
Spices: The blend of cinnamon, nutmeg, cloves, and ginger gives these muffins their warm, fall flavor. You can substitute with pumpkin pie spice if you have it on hand, but adjust the amount based on your preference!
How Do I Ensure My Muffins Come Out Moist and Fluffy?
To achieve that perfect texture, here are some essential tips:
- Don’t Overmix: When folding in the dry ingredients, mix just until combined. Overmixing can lead to tough muffins.
- Use Room Temperature Ingredients: Let your eggs and sour cream come to room temperature. This helps them mix better and creates a smoother batter.
- Check for Doneness: Insert a toothpick into the center of a muffin. If it comes out clean or with a few crumbs, they are ready!
- Cool Properly: Let the muffins cool in the pan for about 5 minutes, then transfer them to a wire rack. This prevents them from becoming soggy.
By following these tips, you’ll have muffins that are light, moist, and full of flavor every time!
Delicious Pumpkin Sour Cream Muffins
Ingredients You’ll Need:
- For the Muffins:
- 1 3/4 cups all-purpose flour
- 1 teaspoon baking powder
- 1/2 teaspoon baking soda
- 1/2 teaspoon salt
- 1 1/2 teaspoons ground cinnamon
- 1/2 teaspoon ground nutmeg
- 1/4 teaspoon ground cloves
- 1/4 teaspoon ground ginger
- 1 cup granulated sugar (plus extra for topping)
- 1/2 cup vegetable oil
- 1/4 cup unsalted butter, melted
- 2 large eggs
- 1 cup canned pumpkin puree (not pumpkin pie filling)
- 1/2 cup sour cream
- 1 teaspoon vanilla extract
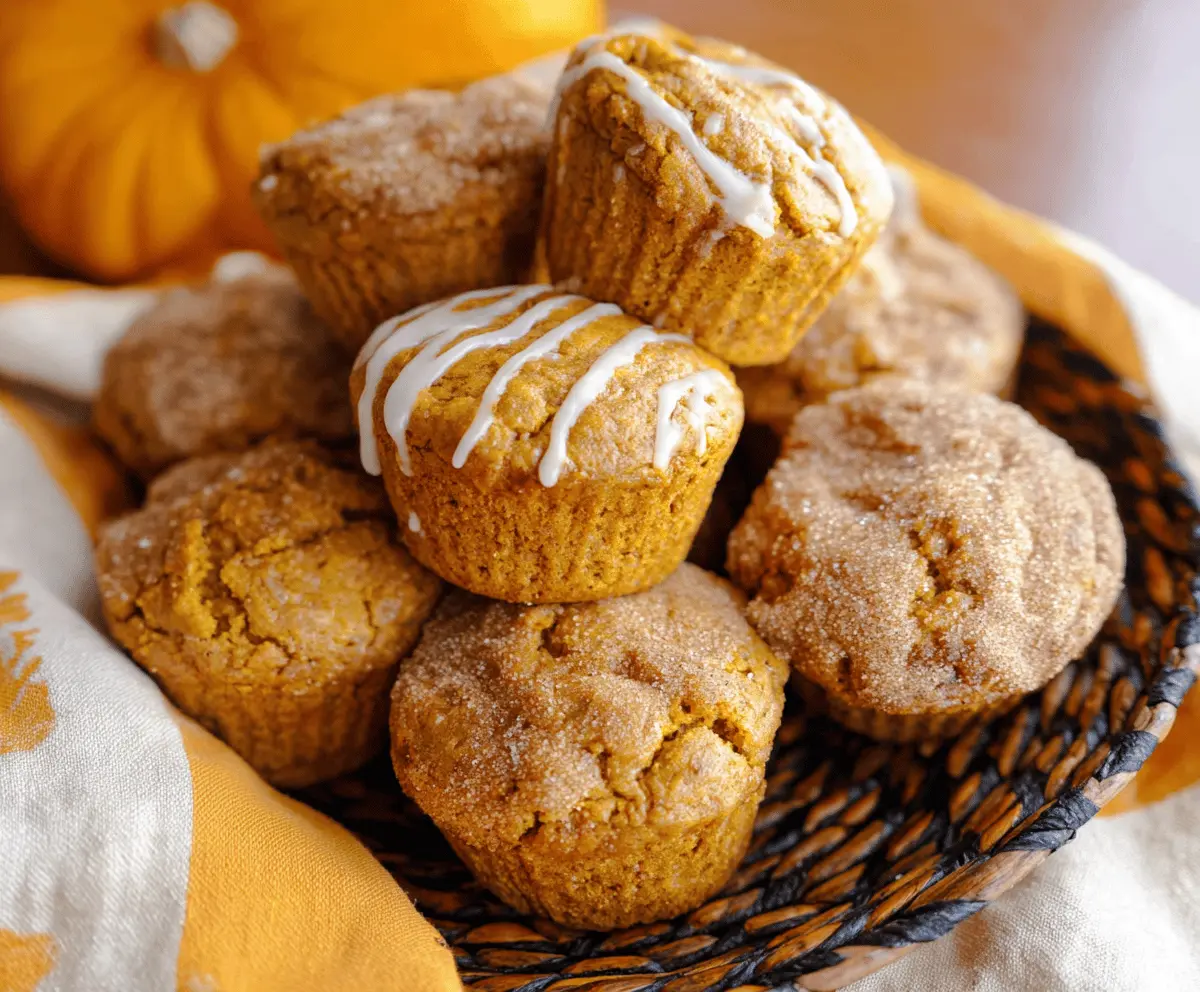
- For the Optional Glaze:
- 1/2 cup powdered sugar
- 1-2 tablespoons milk or cream
- 1/4 teaspoon vanilla extract
How Much Time Do You Need?
This delightful Pumpkin Sour Cream Muffins recipe takes about 15 minutes to prepare and around 20-25 minutes to bake. Plus, you might want to let them cool for a bit before enjoying them, which takes about 5 minutes. So overall, you’re looking at a total of about 40-45 minutes to get these yummy muffins from your kitchen to your table!
Step-by-Step Instructions:
1. Preheat and Prepare Your Muffin Tins:
Start by preheating your oven to 350°F (175°C). Line a 12-cup muffin tin with paper liners or give the cups a light grease to prevent sticking.
2. Mix the Dry Ingredients:
In a medium-sized bowl, whisk together the all-purpose flour, baking powder, baking soda, salt, and all the delightful spices: cinnamon, nutmeg, cloves, and ginger. Set this bowl aside for now.
3. Combine the Wet Ingredients:
In a large mixing bowl, combine the granulated sugar, vegetable oil, melted butter, and eggs. Whisk them all together until they’re well mixed and smooth. Then, add in the pumpkin puree, sour cream, and vanilla extract. Mix it all until creamy and well combined.
4. Combine Wet and Dry Mixtures:
Now it’s time to mix the dry ingredients with the wet ones! Gradually fold the dry ingredients into the wet mixture just until everything is combined. Remember, don’t overmix—this helps keep your muffins tender and light!
5. Fill the Muffin Tins:
Carefully divide the batter evenly among the muffin cups. Fill each cup about two-thirds full for the best results.
6. Add a Sweet Topping:
Sprinkle a bit of granulated sugar on top of each muffin for a delightful sweet crunch once they bake.
7. Bake the Muffins:
Pop the muffin tin into your preheated oven and let them bake for about 20-25 minutes. To test for doneness, insert a toothpick into the center of a muffin—if it comes out clean or with just a few crumbs, they’re ready!
8. Cool and Serve:
Once baked, remove the muffins from the oven and let them cool in the pan for about 5 minutes. Then, carefully transfer them to a wire rack to cool completely. If you’re adding the optional glaze, whisk the powdered sugar, milk, and vanilla together in a small bowl until smooth. Drizzle it over your cooled muffins.
9. Enjoy!
These muffins are best enjoyed fresh, but they can also be stored in an airtight container at room temperature for a couple of days (if they last that long!). Enjoy your moist and flavorful Pumpkin Sour Cream Muffins with a warm cup of coffee or tea!
Happy baking! 🎃
Can I Use Fresh Pumpkin Instead of Canned Puree?
Absolutely! If you want to use fresh pumpkin, be sure to cook and puree it properly. Roast the pumpkin in the oven or steam it until tender, then blend until smooth. Just make sure it’s completely cooled before adding it to the muffin batter!
What Can I Substitute for Sour Cream?
You can easily substitute sour cream with plain yogurt for a similar creaminess and tang. Buttermilk is another great option if you want a bit of acidity and moisture. Just keep the same measurement!
How Should I Store Leftover Muffins?
Store any leftover muffins in an airtight container at room temperature for up to 3 days. For longer storage, you can freeze them: just let them cool completely, then wrap each muffin tightly in plastic wrap and place them in a freezer bag. They’ll last for up to 3 months!
Can I Make These Muffins Gluten-Free?
Yes! You can substitute all-purpose flour with a 1:1 gluten-free flour blend. Just keep an eye on the texture, as gluten-free options may yield slightly different results, but they should still be delicious!


