
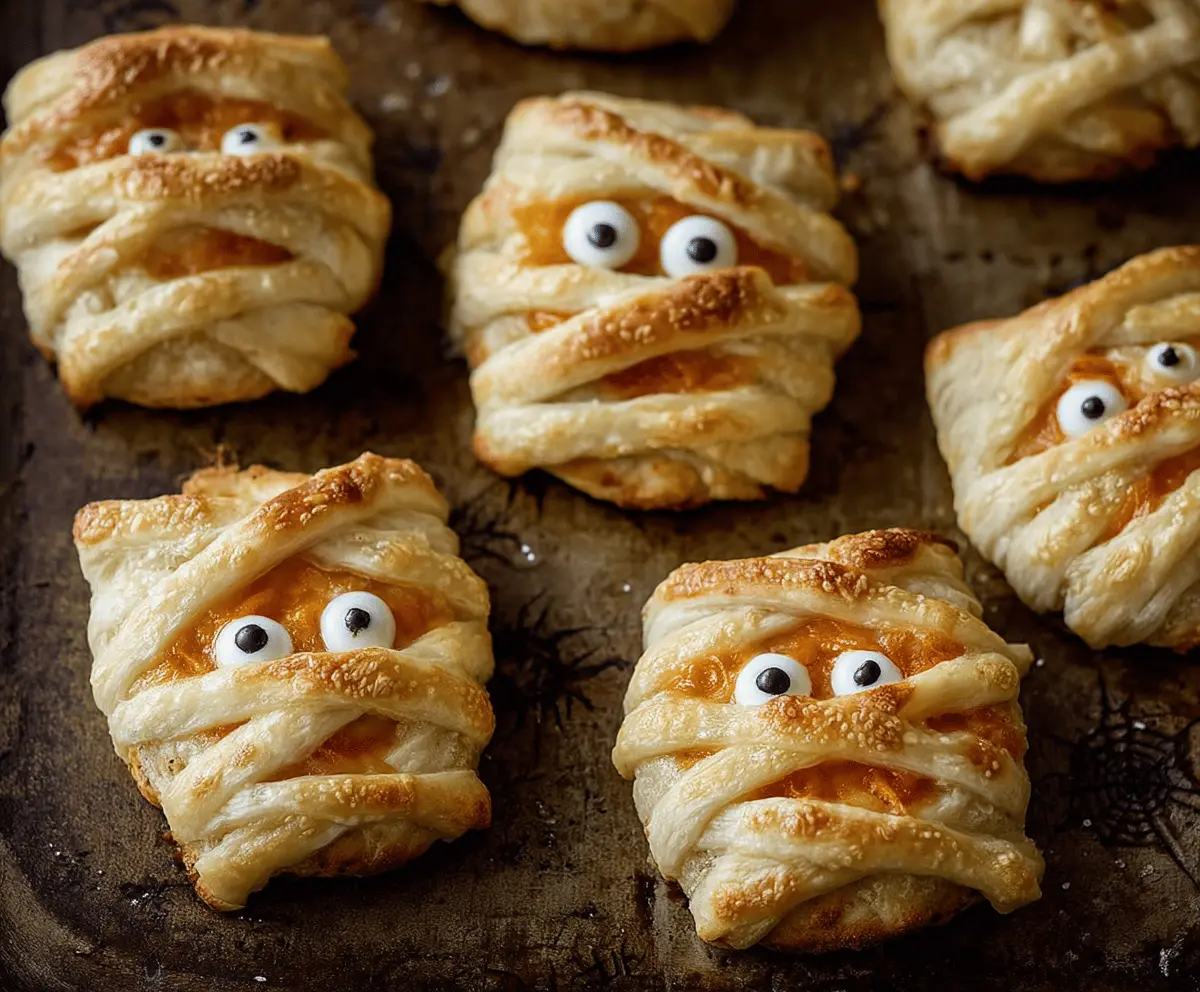
These Baked Cheese Mummies are a fun and tasty snack! With gooey cheese wrapped in flaky pastry, they are perfect for Halloween or anytime you want a smile.
Kids love these little spooky treats, and honestly, so do I! I can’t resist pulling apart the crispy layers to get to that melty cheese inside. Yum! 🧀
Key Ingredients & Substitutions
Puff Pastry: This is essential for the flaky layer of the mummy. If you need a gluten-free option, look for gluten-free puff pastry or use phyllo dough, but be aware that the texture will change slightly.
Cheddar Cheese: I love using sharp cheddar for its rich flavor, but feel free to substitute with mozzarella for a milder taste. You can also use a dairy-free cheese for a vegan version.
Cream Cheese: It adds creaminess to your cheese filling. You can swap in ricotta or a dairy-free cream cheese option if needed. This keeps the mixture soft and gooey.
Egg Wash: This gives the mummies a beautiful golden color. If you’re avoiding eggs, simply brush with almond milk or non-dairy milk.
How Do You Wrap the Mummies Neatly?
Wrapping the cheese in pastry can be tricky, but it’s easy with a little practice. Here’s what you can do to ensure your mummies look great:
- After cutting the strips, make sure they are even; this helps create a uniform look.
- Start by placing the strips at one end of the cheese-filled rectangle, pressing down lightly.
- Crisscross the strips over the filling, leaving gaps for the eyes as you go. Think of it as a blanket — no need to overthink, just keep it fun!
- Don’t worry about making it perfect; the ‘messy’ look makes them more spider-like!
Take your time and have fun when wrapping the mummies. It’s all part of the Halloween charm! 🎃
Baked Cheese Mummies
Ingredients You’ll Need:
- 1 sheet of puff pastry (thawed if frozen)
- 1 cup shredded cheddar cheese
- 2 tablespoons cream cheese (softened)
- 1 teaspoon garlic powder
- 1/2 teaspoon smoked paprika (optional)
- 1 egg (for egg wash)
- Edible candy eyes or small dots of cream cheese with black food coloring for eyes
- Fresh parsley or chives, finely chopped (optional, for garnish)
How Much Time Will You Need?
This recipe takes about 20 minutes to prepare, plus an additional 15-20 minutes to bake. So, set aside about 40 minutes in total to whip up these delightful treats!
Step-by-Step Instructions:
1. Preheat Your Oven:
Start by preheating your oven to 375°F (190°C). While the oven warms up, line a baking sheet with parchment paper to keep your mummies from sticking.
2. Mix the Cheese Filling:
In a mixing bowl, combine the shredded cheddar cheese, softened cream cheese, garlic powder, and smoked paprika. Stir until everything is well mixed and creamy. This cheesy mixture will be the star of our mummies!
3. Prepare the Puff Pastry:
Take your puff pastry and cut it into small rectangles, about 3×4 inches in size. Each rectangle will hold one mummy. This is where the fun begins!
4. Fill the Mummies:
Place a generous tablespoon of the cheesy mixture into the center of each pastry rectangle. Don’t be shy with the filling; you want them to be gooey and delicious!
5. Cut and Wrap:
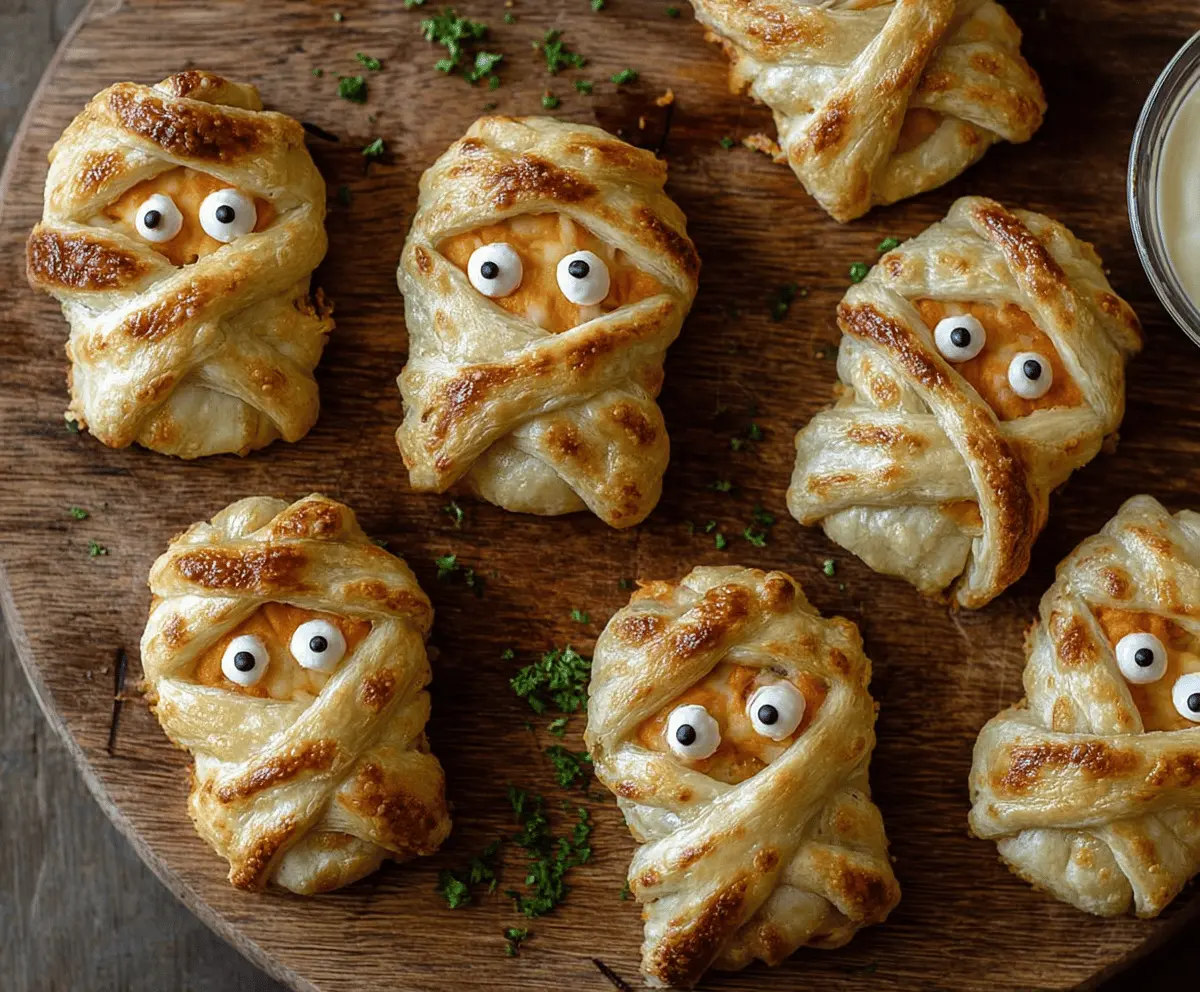
Cut the remaining puff pastry into thin strips, about 1/4 inch wide. Wrap these strips around the cheese-filled rectangles in a crisscross pattern, leaving small gaps for the “eyes.” It’s okay if they look a little messy; that adds to the spooky charm!
6. Brush for Shine:
Beat the egg and use it to brush the wrapped mummies. This step gives them a lovely golden color when baked.
7. Bake to Perfection:
Place the mummies on your prepared baking sheet and pop them in the oven. Bake for 15-20 minutes, or until they are golden brown and puffed up beautifully.
8. Add the Eyes:
When you take them out of the oven, use the warm mummies to gently press in two candy eyes into the exposed areas for a fun and spooky look!
9. Garnish and Serve:
If you’d like, sprinkle some chopped parsley or chives around the mummies for a touch of color. Serve these warm, with your choice of dipping sauce, like ranch or marinara, and enjoy the spooky deliciousness!
Now you’re ready to enjoy your cheerful and cheesy Baked Cheese Mummies! Perfect for any gathering, especially on Halloween! 🧛♂️👻
Can I Use Different Cheeses for the Filling?
Absolutely! While cheddar cheese is delicious, you can mix it up with mozzarella for a gooey texture, or even use pepper jack for a spicy kick. Just keep in mind that different cheeses may change the flavor profile!
How Do I Store Leftover Cheese Mummies?
Leftover Baked Cheese Mummies can be stored in an airtight container in the fridge for up to 3 days. To reheat, pop them in the oven at 350°F (175°C) for about 10 minutes to bring back their crispiness. You can also microwave them for a quicker option, but they might lose some of their flaky texture.
Can I Prepare the Mummies in Advance?
Yes, you can! Assemble the mummies without baking them, and place them in the fridge covered with plastic wrap for up to 24 hours. When you’re ready to bake, just add a few extra minutes to the baking time if they are cold from the fridge.
How Can I Make These Vegan-Friendly?
To make vegan Baked Cheese Mummies, use vegan puff pastry and a dairy-free cheese substitute. You can also replace the cream cheese with cashew cream or tofu mixed with nutritional yeast for the filling. Be sure to use a plant-based egg wash or simply brush with almond milk before baking!


