
These Halloween Chocolate Chip Cookies are a fun treat! With soft, chewy centers and loads of gooey chocolate chips, they are perfect for sharing or sneaking a bite yourself.
What makes them special? They’re festive and sprinkled with colorful Halloween candies! I love baking these with my family while we listen to spooky music—makes it feel extra special! 🎃
Key Ingredients & Substitutions
All-Purpose Flour: This is the base for cookies, providing structure. If you’re gluten-free, consider using a gluten-free flour blend, which can yield great results too!
Unsalted Butter: Allows better control over salt content. You can substitute it with softened coconut oil or even margarine for dairy-free cookies.
Chocolate Chips: Semisweet is classic, but I love mixing in some dark chocolate for richness. If you prefer white chocolate or butterscotch chips, feel free to swap them in!
Granulated Sugar & Brown Sugar: Both add sweetness and moisture. If you’re reducing sugar, try using a blend of stevia and granulated sugar, but adjust the amount according to the conversion chart.
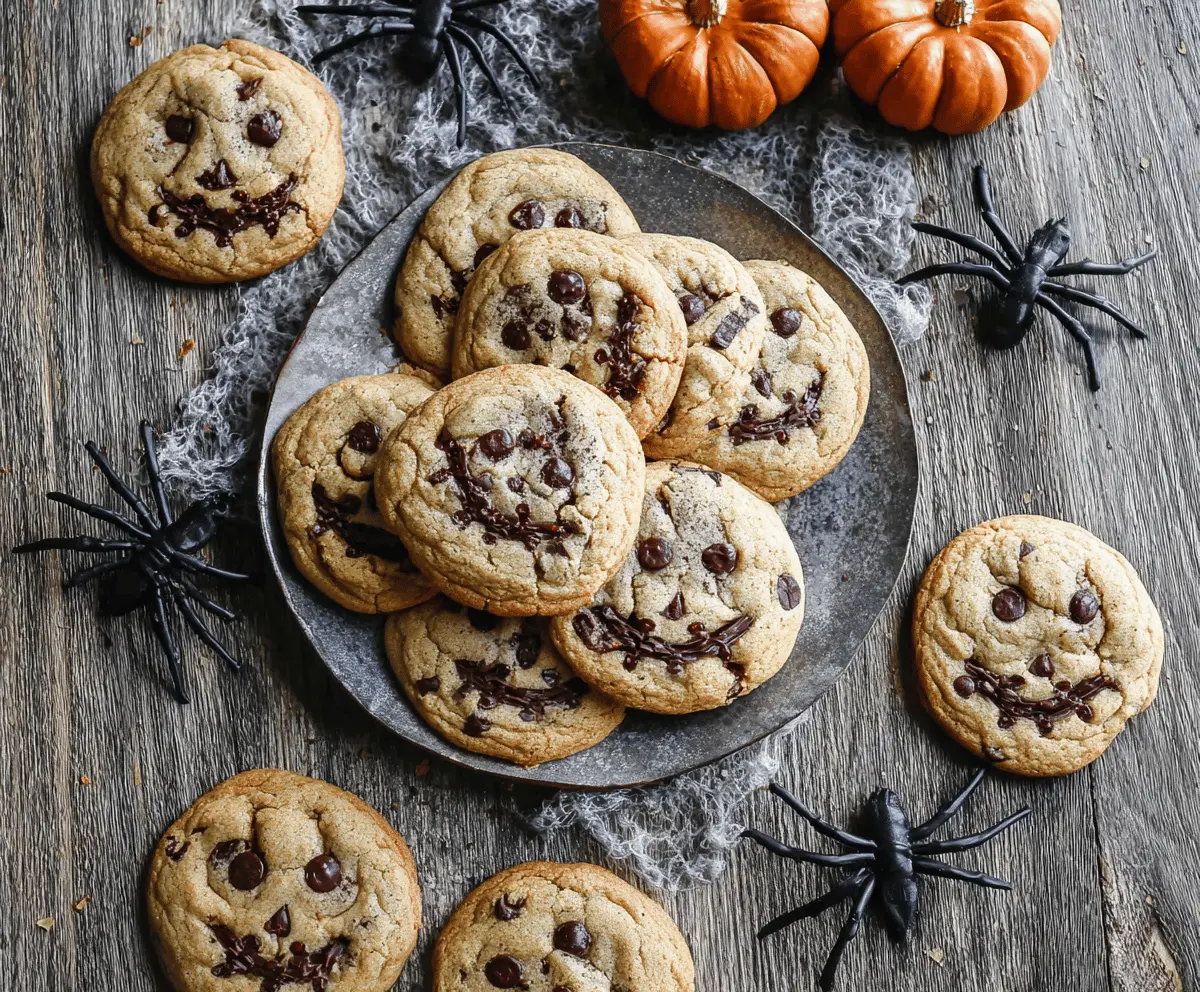
What’s the Best Way to Make Spooky Faces on Cookies?
Decorating these cookies is the fun part! After you’ve placed the dough on the baking sheet, flatten the balls slightly to give more room for the faces. The key is to use chocolate chips for eyes and different shapes for mouths.
- Use the back of a large chocolate chip for a nose.
- For eyes, place two chocolate chips fairly close together at the top.
- For a smile, create a jagged shape with smaller pieces or chocolates.
- Don’t worry about perfection—every cookie will have its unique charm!
Take your time with the decorations as it does enhance the Halloween vibe and makes the process more enjoyable!

Halloween Chocolate Chip Cookies
Ingredients You’ll Need:
- 2 1/4 cups all-purpose flour
- 1/2 teaspoon baking soda
- 1 cup unsalted butter, room temperature
- 1/2 cup granulated sugar
- 1 cup packed light-brown sugar
- 1 teaspoon salt
- 2 teaspoons pure vanilla extract
- 2 large eggs
- 2 cups semisweet and/or bittersweet chocolate chips
- Additional chocolate chips (for decorating faces)
- Optional: mini chocolate chunks to help form facial features
How Much Time Will You Need?
This recipe takes about 20 minutes to prepare, plus 10-12 minutes of baking, and a short time for cooling. In just about 30-40 minutes, you’ll have warm, gooey cookies ready for a spooky celebration!
Step-by-Step Instructions:
1. Preheat the Oven:
Start by preheating your oven to 350°F (175°C). Line your baking sheets with parchment paper or silicone mats, which will help prevent the cookies from sticking.
2. Mix the Dry Ingredients:
In a medium bowl, whisk together 2 1/4 cups of all-purpose flour and 1/2 teaspoon of baking soda. This will help the cookies rise nicely. Set this mixture aside for later use.
3. Cream the Butter and Sugars:
In a large mixing bowl, use a hand mixer or a stand mixer fitted with a paddle attachment to beat 1 cup of room temperature unsalted butter with 1/2 cup of granulated sugar and 1 cup of light-brown sugar until the mixture becomes light and fluffy. This should take about 3 to 4 minutes!
4. Add the Wet Ingredients:
Next, add in 1 teaspoon of salt, 2 teaspoons of pure vanilla extract, and 2 large eggs. Mix until everything is well combined and smooth.
5. Combine the Dry and Wet Mixtures:
Gradually add the flour mixture to the wet ingredients, mixing just until combined. Be careful not to overmix! Once it’s almost combined, fold in 2 cups of chocolate chips with a spatula.
6. Shape the Cookies:
Using a tablespoon or cookie scoop, drop evenly spaced dough balls onto the prepared baking sheets. You can fit about 12 cookies per sheet, depending on the size!
7. Create the Spooky Faces:
Slightly flatten each dough ball with your hand. To decorate, place two chocolate chips near the top center of each cookie for eyes. Form a nose using a small triangular piece of chocolate below the eyes, and create spooky smiles with jagged chocolate chunks or smaller pieces!
8. Bake the Cookies:
Bake your cookies in the preheated oven for 10-12 minutes or until the edges are golden brown but the centers still look soft. Remember, they will continue to bake a bit as they cool!
9. Cool the Cookies:
Once baked, allow your cookies to cool on the baking sheet for about 5 minutes. Then, transfer them to a wire rack to cool completely.
10. Serve and Enjoy:
For a festive touch, arrange your spooky-faced cookies on a platter with Halloween decorations like mini pumpkins, fake spiders, and cobweb fabric. Enjoy your delicious Halloween Chocolate Chip Cookies!
Happy Halloween baking! 🎃
Can I Use Different Types of Chocolate Chips?
Absolutely! While semisweet and bittersweet chocolate chips are classic, feel free to mix it up with white chocolate chips, milk chocolate, or even butterscotch chips. The combination can add a unique flavor twist!
How Long Can I Store the Cookies?
Store your cookies in an airtight container at room temperature for up to 5 days. If you want to keep them longer, you can freeze them! Just place them in a freezer-safe bag or container for up to 3 months.
Can I Make the Dough Ahead of Time?
Yes! You can prepare the cookie dough up to 3 days in advance. Just cover it tightly and store it in the refrigerator. When you’re ready to bake, scoop out portions and bake as directed. You may need to add a minute or two to the baking time if the dough is cold.
What If My Dough Is Too Sticky?
If your dough is sticky, it might be due to warmer temperatures or too much moisture. You can add a little more flour, a tablespoon at a time, until it reaches a workable consistency. Alternatively, chill the dough in the fridge for about 30 minutes before baking to firm it up.


