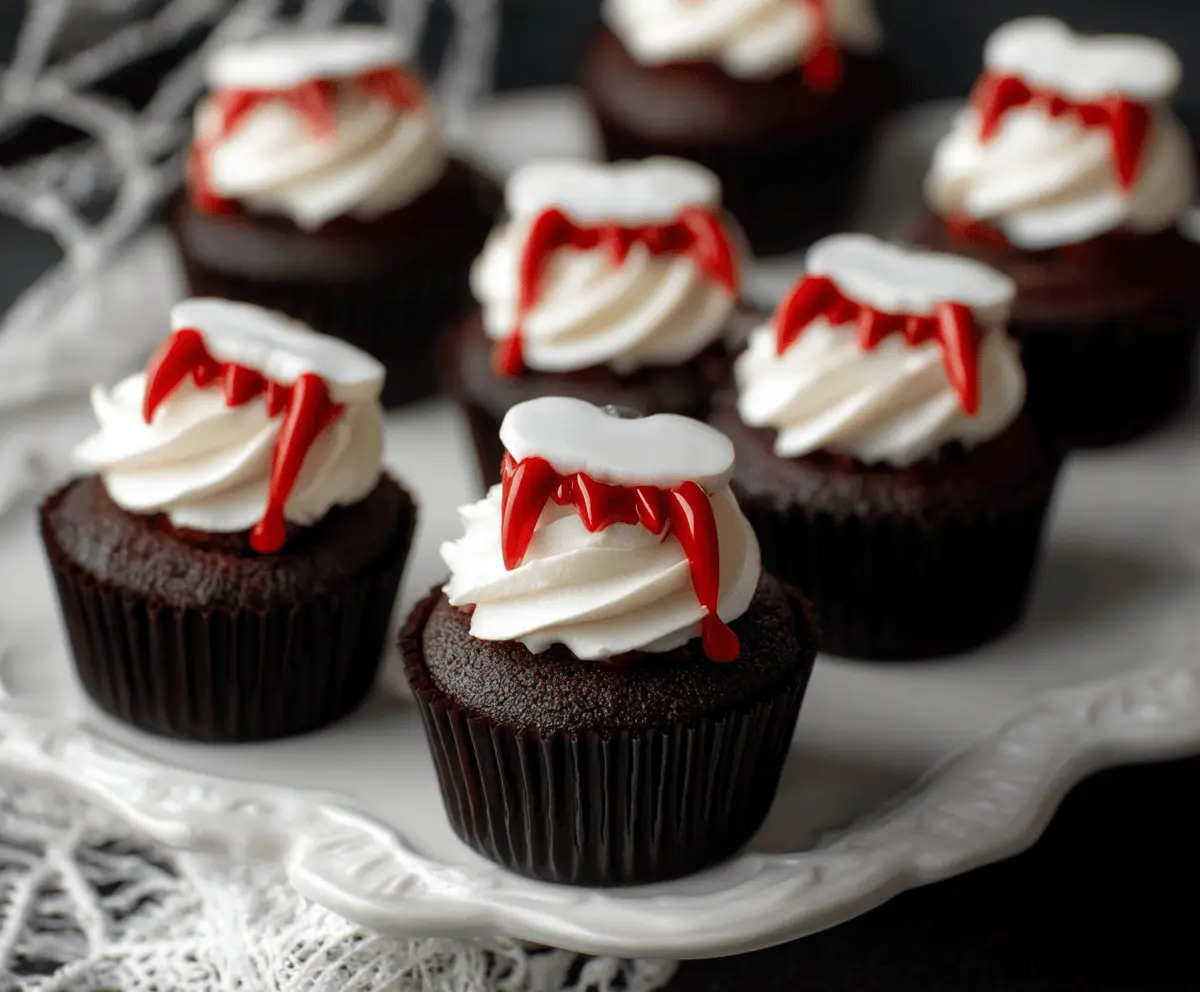

These fun Halloween Vampire Bite Cupcakes are sure to steal the show! Rich chocolate cupcakes are topped with a creamy frosting and bite marks filled with gooey red jelly—perfect for a spooky treat!
Making these cupcakes is a scream! I love decorating them with my little ones; we turn our kitchen into a mini haunted house. Who knew baking could be this much fun? 🧛♂️🧁
Key Ingredients & Substitutions
All-Purpose Flour: This gives structure to the cupcakes. You could use whole wheat flour for a slightly nuttier taste, but the texture will be different.
Cocoa Powder: Unsweetened cocoa powder is key for the chocolate flavor. If you want it sweeter, use Dutch-processed cocoa for a milder taste.
Butter: Unsalted is best to control the salt level. If you’re looking for a dairy-free option, try coconut oil or vegan butter instead!
Buttermilk: It adds moisture and tanginess. If you don’t have any, mix 1/2 cup milk with 1/2 tablespoon vinegar or lemon juice and let it sit for 5 minutes.
Frosting Sugar: Powdered sugar helps achieve a smooth texture in the frosting. You can use a sugar alternative if you need a low-sugar option, but it may change the texture slightly.
How to Achieve the Perfect Cupcake Texture?
Getting your cupcakes light and fluffy starts with cream butter and sugar properly. Here’s how to do it:
- Beat the butter until it’s creamy before adding sugar. This introduces air, making your cupcakes rise.
- When adding eggs, beat them in one at a time, allowing them to fully incorporate. This ensures even mixing.
- Don’t overmix the batter after adding flour. Combine until just mixed to avoid dense cupcakes.
For best results, fill your liners only up to two-thirds. This allows room for rising without overflowing!

Halloween Vampire Bite Cupcakes
Ingredients You’ll Need:
For The Cupcakes:
- 1 cup all-purpose flour
- 1/2 cup cocoa powder, unsweetened
- 1 teaspoon baking soda
- 1/4 teaspoon salt
- 1/2 cup unsalted butter, softened
- 3/4 cup granulated sugar
- 2 large eggs
- 1 teaspoon vanilla extract
- 1/2 cup buttermilk
For The Frosting:
- 1 cup unsalted butter, softened
- 3-4 cups powdered sugar
- 1 teaspoon vanilla extract
- 2-3 tablespoons heavy cream or milk
For Decoration:
- White fondant (for vampire teeth and bite marks)
- Red gel food coloring or red piping gel (to create a blood effect)
- Black cupcake liners
Estimated Time:
This fun Halloween treat will take about 30 minutes to prepare and 20 minutes to bake—plus a little extra time for cooling and decorating. All in all, you can whip these spooky cupcakes up in about 1.5 hours!
Step-by-Step Instructions:
1. Preheat the Oven and Prepare the Liners:
Start by preheating your oven to 350°F (175°C). Line a muffin tin with black cupcake liners to give them that spooky vibe.
2. Mix the Dry Ingredients:
In a mixing bowl, sift together the flour, cocoa powder, baking soda, and salt. This will ensure your cupcakes are light and fluffy. Set this bowl aside for now.
3. Cream the Butter and Sugar:
In a large mixing bowl, take the softened butter and sugar and beat them together until the mixture is light and fluffy. This should take about 2-3 minutes.
4. Add Eggs and Vanilla:
Crack in the eggs one at a time, mixing well after each addition. Then, pour in the vanilla extract and mix until combined.
5. Combine the Wet and Dry Ingredients:
Now, alternately add the dry ingredient mixture and the buttermilk to the butter mixture. Start and end with the dry ingredients, mixing just until everything is combined. Don’t overmix!
6. Fill the Cupcake Liners and Bake:
Carefully divide the batter evenly among the cupcake liners, filling them about two-thirds full. Bake in the preheated oven for 18-20 minutes or until a toothpick comes out clean. Once done, let the cupcakes cool completely on a wire rack.
7. Make the Frosting:
In a clean bowl, beat the softened butter until creamy. Gradually add the powdered sugar, a cup at a time, mixing well until smooth. Add the vanilla and heavy cream, then beat until fluffy and spreadable.
8. Frost the Cupcakes:
Using a piping bag fitted with a large star tip, pipe the frosting onto each cooled cupcake in a whimsical swirl.
9. Prepare the Vampire Teeth:
Roll out the white fondant and use small shapes or cookie cutters to create vampire fangs or bite marks. Let them firm up a bit before decorating.
10. Decorate the Cupcakes:
Place the fondant “bite marks” on top of the frosting. Use the red gel food coloring to create the look of blood dripping from the teeth for a realistic vampire bite effect.
11. Serve and Enjoy!
Arrange your beautifully decorated vampire bite cupcakes on a spooky serving platter, and get ready to impress your guests with this deliciously frightful treat!
Can I Use Different Flours for This Recipe?
Yes, you can experiment with different flours! Whole wheat flour can add a nutty flavor, but it may alter the cupcake’s texture slightly. Gluten-free flour blends can also work for a gluten-free option; just follow the package instructions for substitutions.
How Should I Store Leftover Cupcakes?
Store any leftover cupcakes in an airtight container at room temperature for up to 3 days. If you want to keep them longer, refrigerate them for up to a week. Just remember to let them come back to room temperature before serving for optimal taste!
Can I Make the Cupcakes Ahead of Time?
Absolutely! You can bake the cupcakes up to 2 days in advance. Allow them to cool completely, then store them in an airtight container. Frost them just before serving for the best freshness!
What Can I Use Instead of Buttermilk?
If you don’t have buttermilk on hand, mix 1/2 cup of milk with 1/2 tablespoon of vinegar or lemon juice and let it sit for about 5 minutes. This makes a quick buttermilk substitute that will work perfectly in the recipe!


