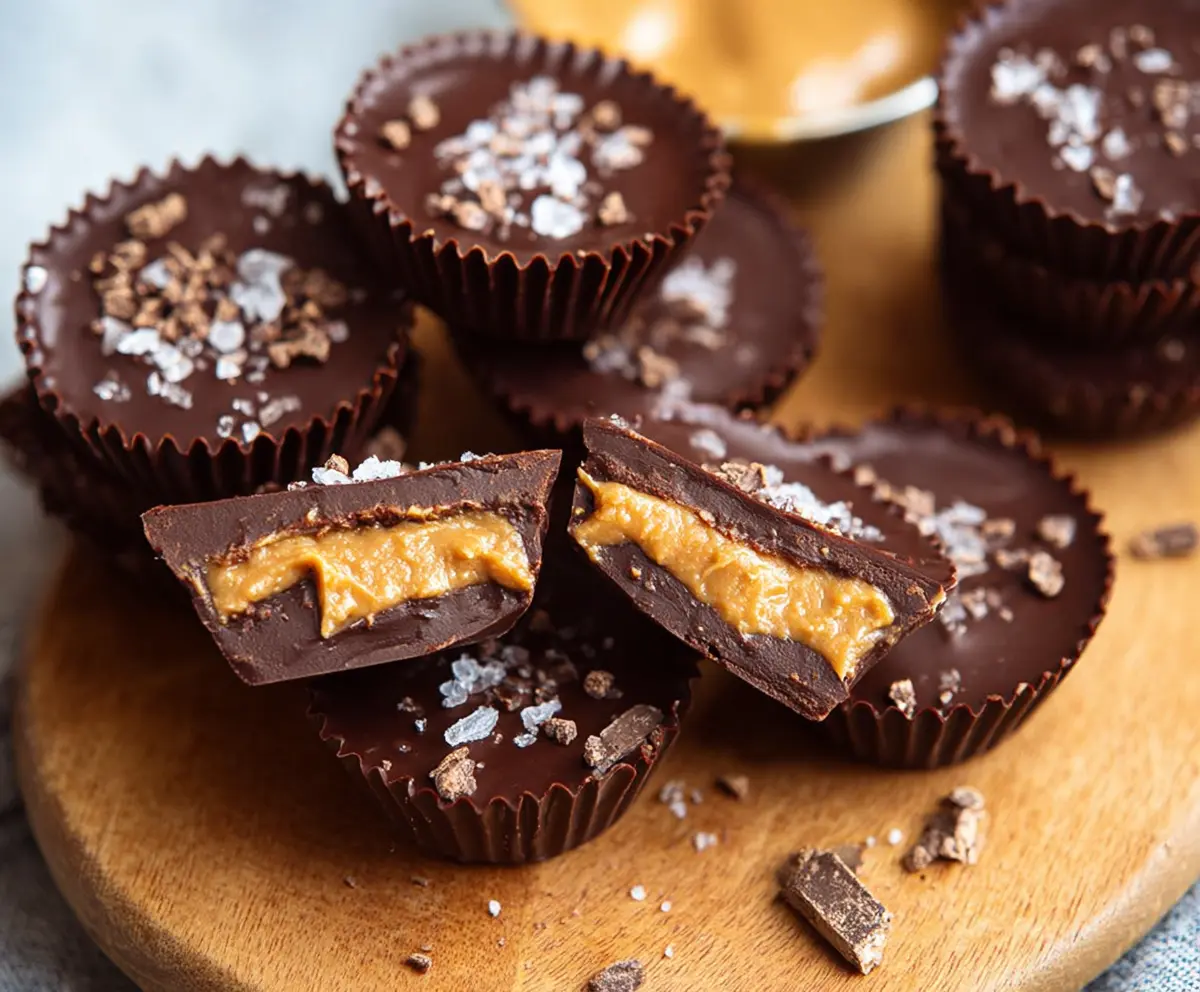

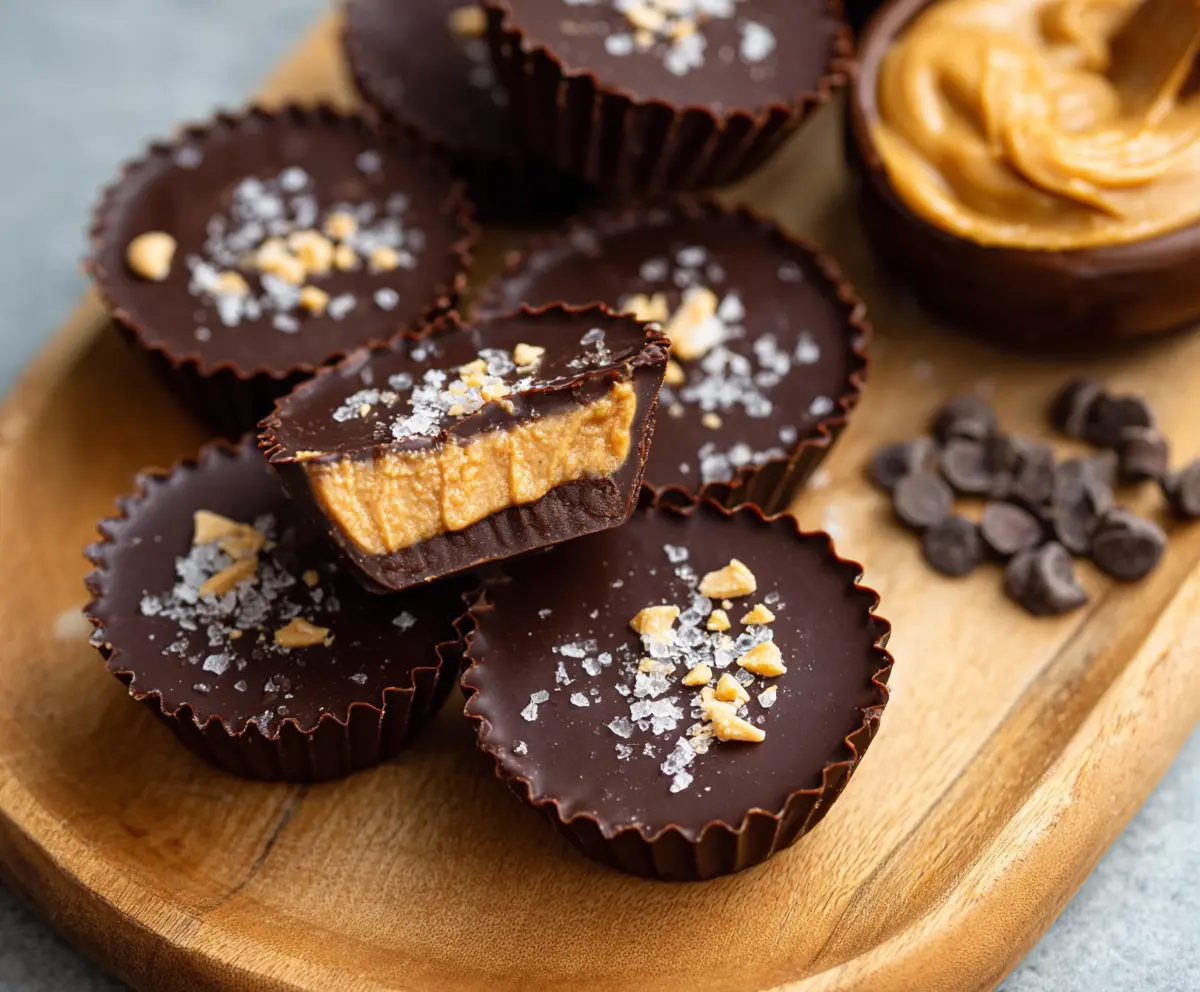
These Healthy Dark Chocolate Peanut Butter Cups are a tasty treat that won’t ruin your day! Made with rich dark chocolate and creamy peanut butter, they’re simple to whip up!
They satisfy that sweet tooth without being too guilty. I love keeping them in the fridge for a quick bite when cravings hit. Plus, they’re fun to make! Who doesn’t love chocolate?
Key Ingredients & Substitutions
Peanut Butter: I suggest using natural creamy peanut butter for the best flavor and texture. If you’re allergic or prefer a different nut, try almond or cashew butter instead.
Maple Syrup or Honey: Both sweeteners add natural sweetness. If avoiding sugar, agave syrup or a sugar-free alternative works great too!
Dark Chocolate: Choose chocolate with 70% cacao or higher for richer taste and health benefits. If you’re dairy-free, look for vegan chocolate chips.
Coconut Oil: This is optional and makes the chocolate smoother. If you don’t have it, you can skip it or use a vegetable oil like canola or avocado oil.
How Do I Melt Chocolate Without Burning It?
Melting chocolate can be tricky; too much heat can make it seize or become gritty. Here’s how to do it right:
- Use short bursts in the microwave, about 30 seconds each, stirring after each burst until smooth.
- If using a double boiler, make sure the water doesn’t touch the bottom of the bowl; the steam does the work.
- Always keep the heat low and stir often. Patience is key for a silky chocolate!
How to Make Healthy Dark Chocolate Peanut Butter Cups
Ingredients You’ll Need:
For the Peanut Butter Filling:
- 1 cup natural creamy peanut butter (preferably unsweetened)
- 2 tablespoons pure maple syrup or honey
- 1/4 teaspoon sea salt (plus extra for topping)
For the Chocolate Layer:
- 1 1/2 cups dark chocolate chips or chopped dark chocolate (70% cacao or higher)
- 1 teaspoon coconut oil (optional, for smoother chocolate)
For Garnish (optional):
- Cocoa nibs or additional coarse sea salt
How Much Time Will You Need?
This recipe takes about 15 minutes of prep time, plus an additional 30-40 minutes to chill in the freezer. You’ll spend a few minutes mixing the delicious filling, melting the chocolate, and assembling the cups. Then, just let them chill until they’re firm. They’re absolutely worth the wait!
Step-by-Step Instructions:
1. Prepare the Peanut Butter Filling:
In a medium bowl, combine the peanut butter, maple syrup (or honey), and 1/4 teaspoon of sea salt. Use a spatula to mix everything together until it’s smooth and well combined. Set this tasty filling aside for later.
2. Set Up Your Tin:
Grab a mini muffin tin and line it with paper cupcake liners. This will make it super easy to remove the cups once they are made!
3. Melt the Dark Chocolate:
In a microwave-safe bowl, combine the dark chocolate chips and coconut oil (if using). Microwave in 30-second intervals, stirring in between, until everything is fully melted and smooth. Alternatively, you can melt the chocolate using a double boiler on the stove.
4. Create the Chocolate Base:
Using a spoon, take about 1 teaspoon of melted chocolate and pour it into the bottom of each cupcake liner. Gently spread it to cover the bottom for an even layer. Once done, place the tray in the freezer for about 10 minutes to let the chocolate harden.
5. Add the Peanut Butter Filling:
After the chocolate has set, take the tray out of the freezer. Add approximately 1 teaspoon of the peanut butter mixture into each chocolate base. Use a small spoon or your fingers to flatten the top of the peanut butter gently.
6. Seal with More Chocolate:
Carefully cover the peanut butter with another teaspoon of melted chocolate, making sure to seal the filling inside. Give the tin a gentle tap on the counter to level out the chocolate on top.
7. Garnish:
For an extra touch, sprinkle a pinch of coarse sea salt and/or a few cocoa nibs on top of each cup. This adds a delicious crunch and flavor!
8. Chill Until Firm:
Return the tray to the freezer and let it chill for at least 20-30 minutes until everything is completely firm. The longer they set, the better they’ll be!
9. Enjoy Your Treat!
Once firm, carefully remove the peanut butter cups from the liners and place them in an airtight container. Store in the refrigerator to keep them fresh.
10. Serve Up:
Enjoy your homemade healthy dark chocolate peanut butter cups chilled or at room temperature. Whether for a sweet treat or a quick snack, you’ll love the rich chocolate and creamy peanut butter combination!
Happy snacking!
Can I Use Crunchy Peanut Butter Instead of Creamy?
Absolutely! Feel free to use crunchy peanut butter for added texture. Just keep in mind it may slightly alter the creamy filling experience.
Can I Make These Vegan?
Yes! To keep the recipe vegan, use maple syrup instead of honey and ensure your dark chocolate is dairy-free or labeled as vegan.
How Do I Store These Peanut Butter Cups?
Store your peanut butter cups in an airtight container in the refrigerator for up to 2 weeks. They can also be frozen for longer storage; just separate layers with parchment paper.
Can I Use Another Type of Nut Butter?
Definitely! You can substitute peanut butter with almond butter, cashew butter, or any nut or seed butter you prefer. Just ensure it’s smooth for the best consistency!


