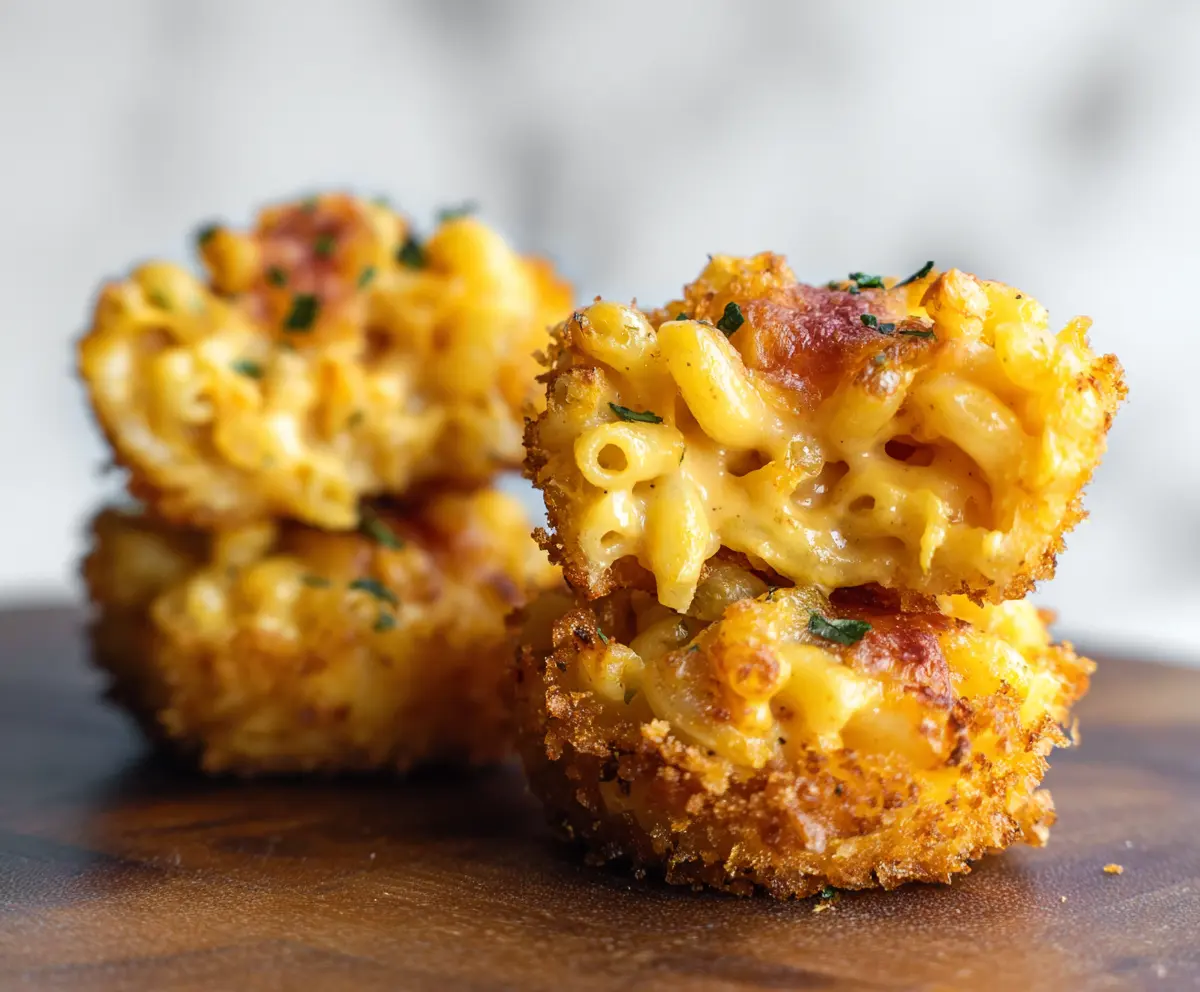

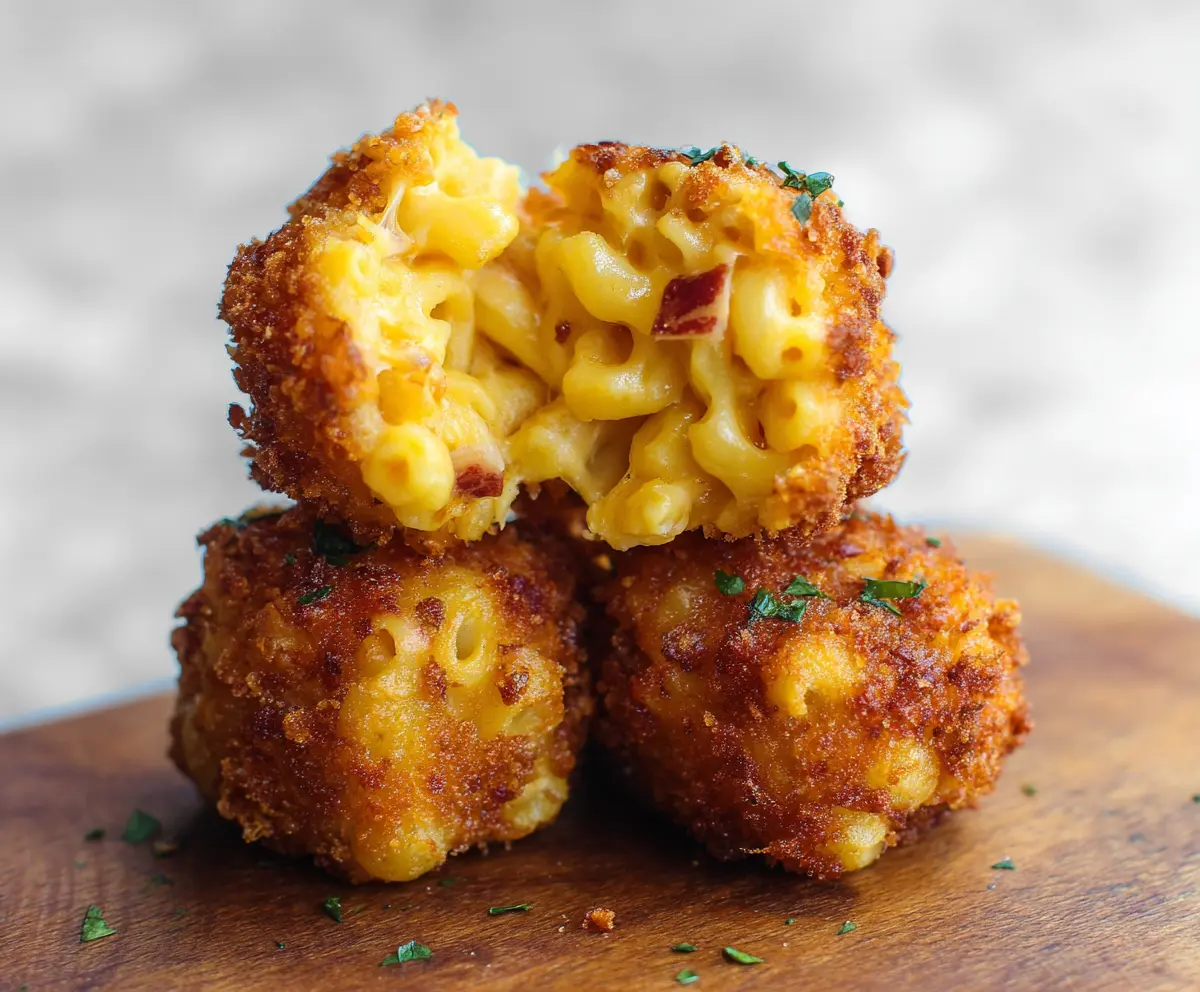
Macaroni and Cheese Bites are little bursts of cheesy happiness! These tasty treats are filled with creamy mac and cheese, coated in crunchy breadcrumbs, and baked until golden.
Perfect as a snack or a fun party dish, they disappear fast! Who can resist mini cheesy goodness? I love serving them with a side of ketchup or a tangy dip—yum!
Key Ingredients & Substitutions
Elbow Macaroni: This is the classic choice for macaroni and cheese. If you want something different, you can use small shells or fusilli instead, which hold cheese sauce well.
Cheeses: Sharp cheddar gives a wonderful flavor, and mozzarella adds creaminess. You could swap cheddar for a milder cheese like Monterey Jack or use a vegan cheese blend if you’re dairy-free.
Panko Breadcrumbs: These breadcrumbs create a great crunch. If you don’t have panko, regular breadcrumbs work too, but they might not be as crispy. Gluten-free breadcrumbs are also an option.
Eggs: Eggs help bind everything together. If you want an egg-free option, try using flaxseed meal mixed with water or unsweetened applesauce as a substitute.
How Do I Get the Perfect Crunch on My Bites?
To achieve that delicious crunch, it’s all about the coating technique! Follow these steps:
- After shaping your mac and cheese bites, make sure to dip them in the beaten eggs fully. This helps the breadcrumbs stick well.
- Roll each bite in panko breadcrumbs generously to cover every surface. Press down slightly to ensure the crumbs adhere.
- Give them enough space on the muffin tin or baking sheet so they bake evenly and don’t steam.
- Baking at a higher temperature (375°F or 190°C) helps them crisp up nicely. Keep an eye on them in the oven!
Letting them cool for a few minutes also helps them firm up and makes them easier to handle.
How to Make Macaroni And Cheese Bites
Ingredients You’ll Need:
For the Mac and Cheese:
- 2 cups elbow macaroni
- 2 cups shredded sharp cheddar cheese
- 1 cup shredded mozzarella cheese
- 1/2 cup grated Parmesan cheese
For the Sauce:
- 3 tablespoons unsalted butter
- 3 tablespoons all-purpose flour
- 2 cups whole milk
- 1/2 teaspoon salt
- 1/2 teaspoon black pepper
- 1/4 teaspoon paprika (optional)
For the Coating:
- 2 large eggs
- 1 1/2 cups panko breadcrumbs
- 1/2 teaspoon garlic powder (optional)
- Chopped fresh parsley for garnish (optional)
- Cooking spray or butter for greasing the muffin tin
How Much Time Will You Need?
This delicious recipe takes about 15 minutes of prep time and 30 minutes total baking time. You also need to chill the mixture for 30 minutes, so plan for about 1 hour and 15 minutes overall. It’s worth every minute for those golden, cheesy bites!
Step-by-Step Instructions:
1. Cook the Elbow Macaroni:
Start by cooking the elbow macaroni in a large pot of boiling salted water. Follow the package directions until they are al dente, then drain and set aside.
2. Prepare the Cheese Sauce:
In a medium saucepan over medium heat, melt the butter. Once melted, whisk in the flour and cook for 1-2 minutes until it turns lightly golden. This means you’re making a roux, which thickens your cheese sauce!
3. Add Milk and Thicken the Sauce:
Slowly whisk in the milk and keep stirring until the mixture thickens and coats the back of a spoon, about 5-7 minutes. You want a nice, creamy consistency.
4. Mix in the Cheeses:
Remove your saucepan from the heat and stir in the shredded cheddar, mozzarella, and Parmesan cheese. Keep stirring until all the cheese is melted and smooth, then season with salt, pepper, and paprika if you’d like.
5. Combine with Pasta:
Add your cooked macaroni to the cheesy sauce and mix well so every piece is covered in that amazing cheese!
6. Chill the Mixture:
Let the mac and cheese mixture cool slightly, then place it in the refrigerator for about 30 minutes. This will help it firm up and be easier to shape.
7. Preheat the Oven:
While the mixture is chilling, preheat your oven to 375°F (190°C) and lightly grease a mini muffin tin with cooking spray or butter.
8. Prepare the Breading Stations:
In a shallow bowl, beat the eggs. In another shallow bowl, mix together the panko breadcrumbs and garlic powder, if you’re using it.
9. Form the Bites:
Using a spoon or your hands, scoop about 1 heaping tablespoon of the chilled mac and cheese mixture. Shape it into small balls or press them firmly into the mini muffin cups.
10. Coat the Bites:
Dip each ball in the beaten eggs first, then roll them in the panko breadcrumbs ensuring they are well coated.
11. Bake the Bites:
Place the coated bites into the greased muffin tin, ensuring they’re not crowded. Bake them in the preheated oven for about 20-25 minutes, or until they are golden brown and crispy on the outside.
12. Cool and Serve:
Once baked, let the bites cool for about 5 minutes. Carefully remove them from the tin and garnish with chopped parsley if you like. Serve them warm with your favorite dipping sauce!
Enjoy these crispy, cheesy macaroni and cheese bites as a delightful appetizer or snack!
Can I Use Different Cheeses?
Absolutely! While sharp cheddar and mozzarella create a fantastic flavor combination, you can experiment with other cheeses like Monterey Jack, Gruyère, or even a vegan cheese blend for a dairy-free option.
What Can I Use Instead of Panko Breadcrumbs?
If you don’t have panko breadcrumbs, regular breadcrumbs work just fine. Just keep in mind that panko gives a crunchier texture. You could also use crushed crackers or even cornflakes as a substitute!
How to Store Leftovers?
Store any leftover bites in an airtight container in the fridge for up to 3 days. To reheat, place them in a preheated oven at 350°F (175°C) for about 10-15 minutes to regain their crispiness.
Can I Freeze Macaroni And Cheese Bites?
Yes! You can freeze the uncooked bites. Just shape them and place them on a baking sheet to freeze individually before transferring to a freezer-safe container. Bake them directly from the freezer, adding a few extra minutes to the cooking time.


