
Silky salted caramel ice cream in the Ninja Creami has a way of tasting far more complicated than the ingredient list suggests. The base freezes into a dense, creamy pint, then spins into something smooth and scoopable with that deep caramel note that hangs around after each bite. The salt keeps it from going flat, and the cream cheese adds just enough body to keep the texture from turning icy or thin.
The trick here is balance. Caramel sauce brings the flavor, but brown sugar reinforces the cooked-sugar note so the ice cream tastes layered instead of one-dimensional. Blending the cream cheese fully into the base matters, too — any little lump will show up after freezing, and the Creami works best when the mixture starts out completely smooth. A full 24-hour freeze gives the machine enough time to set the base hard all the way through, which is what helps that first spin turn into real ice cream instead of slush.
Below, I’ve included the small details that matter most for Creami pints, plus a few swaps if you want to make this with what you already have on hand.
The caramel flavor came through beautifully and the texture was spot on after one respin. I added a tiny splash of milk and it turned into the creamiest pint, not icy at all.
Save this Ninja Creami salted caramel ice cream for the nights when you want a deep caramel swirl and that salty-sweet finish.
The Part Most Creami Pints Get Wrong: Freezing a Base That’s Too Thin
A lot of homemade ice cream bases taste fine before they freeze and then turn bland or crumbly after spinning. That usually happens when the base is too lean or the flavoring gets diluted by ice crystals. This version leans on both cream and whole milk, but the cream cheese and brown sugar do extra work by adding body, helping the pint freeze into something the machine can shave into a smooth texture instead of a dry, snowy one.
The other mistake is under-seasoning the base before it goes in the freezer. Cold mutes sweetness and salt, so the mixture should taste a little sweeter and a little saltier than you want the final ice cream to taste. Once it’s frozen, those flavors settle down into the right place.
What Each Ingredient Is Doing in This Salted Caramel Base

- Whole milk — This keeps the pint scoopable and gives the Creami enough water content to work with. Lower-fat milk will freeze harder and can turn the texture a little sandy after spinning.
- Heavy cream — This is where the plush texture comes from. You can swap in half-and-half in a pinch, but the final pint won’t have the same dense, rich finish.
- Caramel sauce — Use a sauce you already like the taste of on its own, because it’s the main flavor here. A thick homemade caramel gives the deepest flavor, but a good store-bought sauce works fine.
- Brown sugar — This reinforces the caramel note and adds a little molasses depth. Don’t skip it if your caramel sauce is mild; it makes the base taste more cooked and less one-note.
- Cream cheese — This is the quiet ingredient that keeps the pint from freezing chalky. It has to be fully softened and blended until smooth, or you’ll end up with little specks in the finished ice cream.
- Sea salt — Use a fine salt for the base so it disappears evenly. Flaky salt belongs on top right before serving, where it gives you those sharp little salty hits.
Blending, Freezing, and Spinning the Pint the Right Way
Getting the Base Completely Smooth
Blend the milk, cream, caramel sauce, brown sugar, cream cheese, vanilla, and sea salt until the mixture looks uniform and glossy. The cream cheese should disappear into the liquid; if you can still see tiny lumps, they’ll freeze into little pockets that the machine won’t fully fix later. Taste the base before freezing and adjust the salt if your caramel sauce is particularly sweet. The mix should taste balanced now, not after it’s frozen.
Freezing It Flat and Solid
Pour the base into the pint container, leaving about an inch of space at the top. That headspace matters because the mixture expands slightly as it freezes, and an overfilled pint can warp the texture or make the lid sit unevenly. Freeze it on a level surface for a full 24 hours. If it freezes at an angle, the blade can shave one side harder than the other and leave the spin uneven.
Turning the Frozen Base Into Ice Cream
Process on the Ice Cream setting. If the pint looks crumbly or powdery after the first spin, add just a small splash of milk and respin. Too much milk is the usual mistake here; it can turn a perfect pint loose and soupy fast. You’re looking for a creamy mound that holds together but still scoops easily.
Finishing With the Salted Caramel Top
Drizzle on a little extra caramel sauce and finish with flaky sea salt right before serving. The contrast is what makes the whole bowl taste intentional: cold, creamy ice cream against sticky caramel and sharp salt. If you add the toppings too early, the caramel can sink in and disappear into the pint instead of sitting on top where it belongs.
How to Change the Pint Without Losing the Caramel Payoff
Dairy-Free Version
Use full-fat coconut milk and a dairy-free cream cheese, then keep the caramel sauce dairy-free as well. The texture will still be creamy, but you’ll pick up a faint coconut note, which works nicely with caramel and salt. Freeze and spin the same way, but expect to use a little less respin liquid because coconut milk softens faster.
Extra-Rich Custard-Style Base
Swap 1/2 cup of the milk for more cream if you want an even denser pint. The flavor gets more luxurious, but the ice cream also freezes a touch harder, so the respin may need that splash of milk to loosen it up. This version tastes closest to old-fashioned caramel ice cream.
Salted Caramel Swirl Add-In
After the first spin, spoon a thin ribbon of caramel sauce over the top and give the pint one quick mix-through with a spoon. That leaves little caramel streaks instead of making the whole base overly soft. It’s the best move when you want pockets of gooey caramel in each scoop.
Storage and Re-Spinning Leftovers
- Refrigerator: Not ideal for finished ice cream. It melts fast and loses the texture that makes the Creami worth using.
- Freezer: Freeze any leftover spun ice cream in a sealed container for up to 1 week, but expect it to firm up.
- Reheating: Let it sit at room temperature for 5 to 10 minutes before scooping again. If it gets too hard, respin it with a splash of milk rather than trying to microwave it, which melts the edges before the center softens.
Answers to the Questions Worth Asking
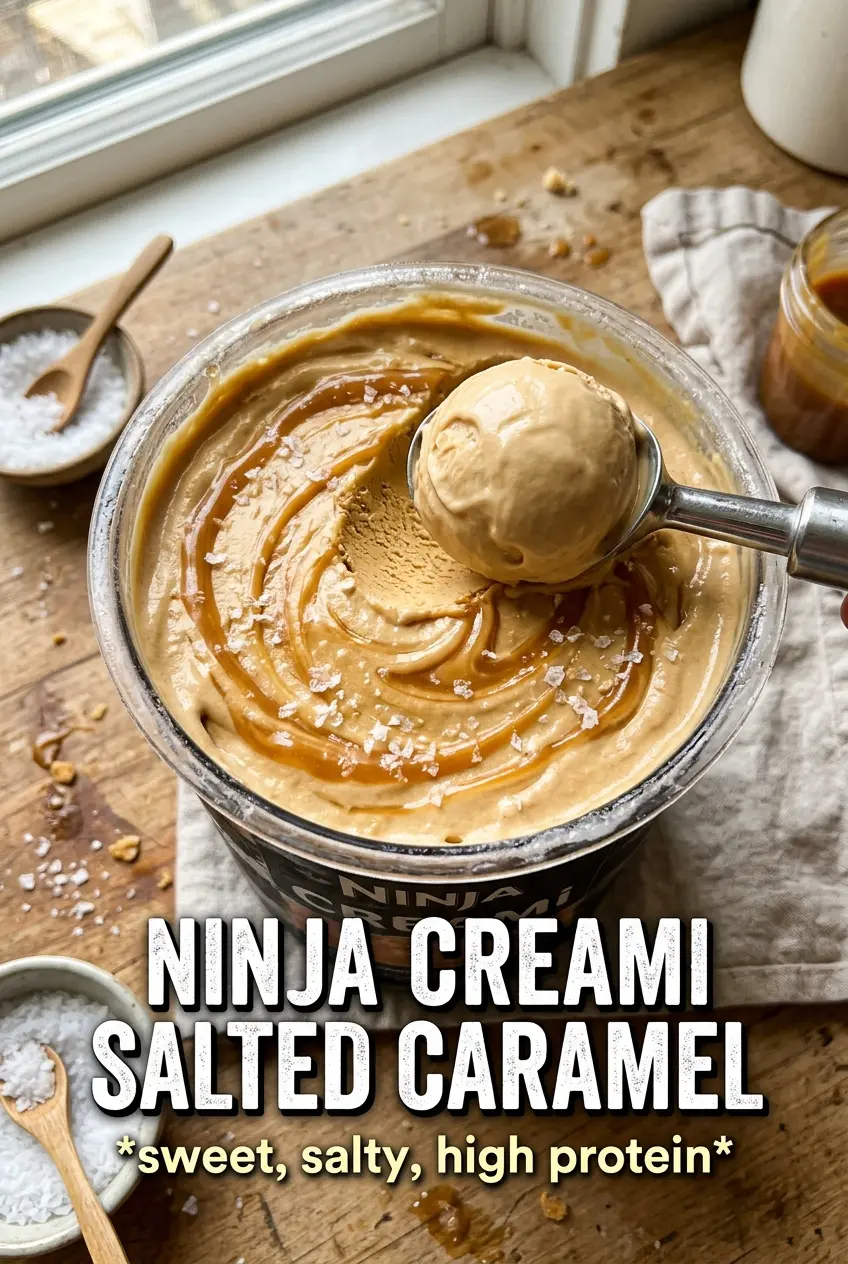
Ninja Creami Salted Caramel Ice Cream
Ingredients
Equipment
Method
- Blend whole milk, heavy cream, caramel sauce, brown sugar, softened cream cheese, vanilla extract, and sea salt until completely smooth with no cream cheese lumps remaining.
- Pour the mixture into the Ninja Creami pint container, leaving 1 inch of headspace.
- Freeze the pint for 24 hours until solid.
- Process on the Ice Cream setting; if it is too firm, re-spin with a splash of milk until the texture is scoopable and creamy.
- Drizzle extra caramel sauce and add a pinch of flaky sea salt on top before serving.


