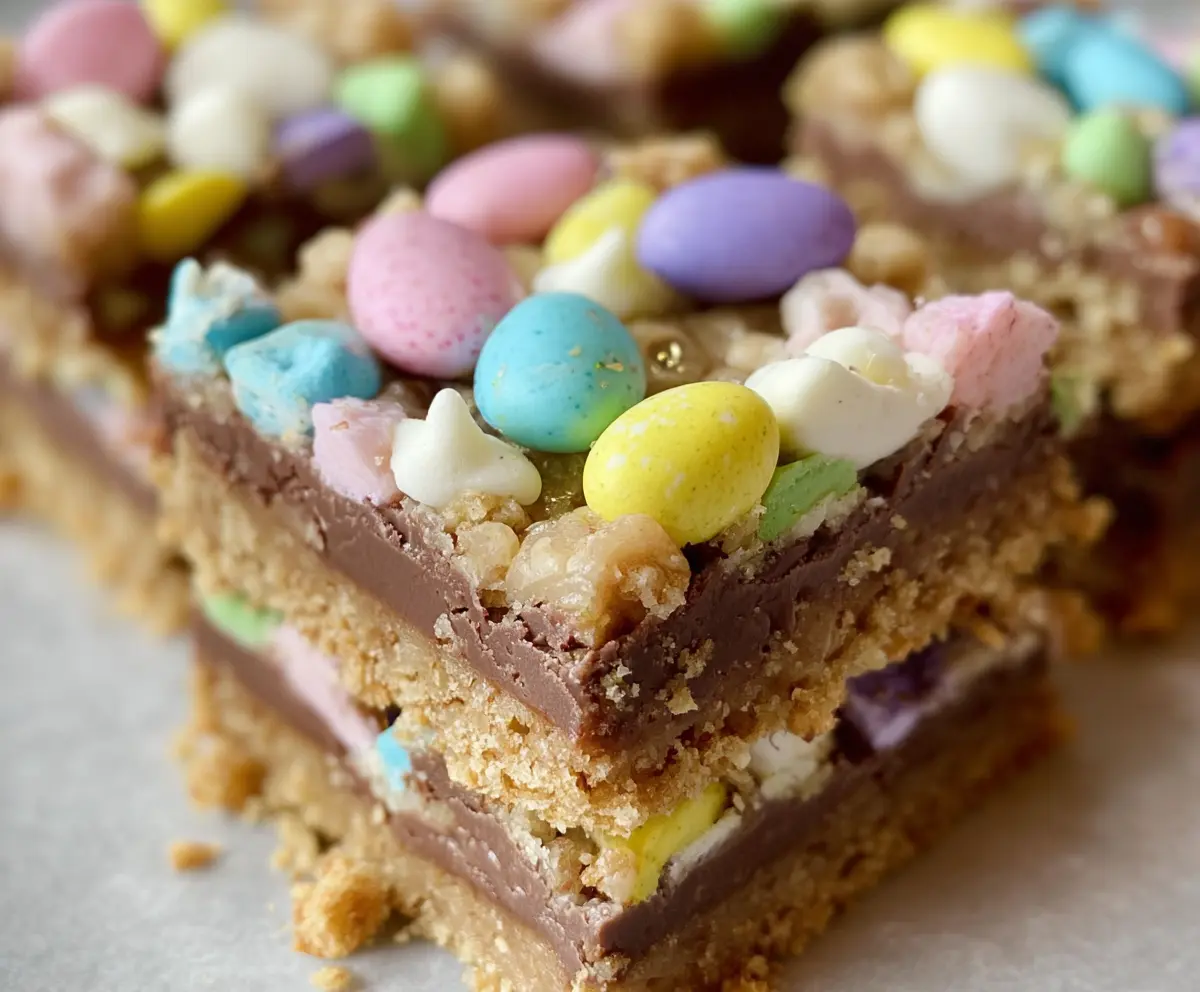
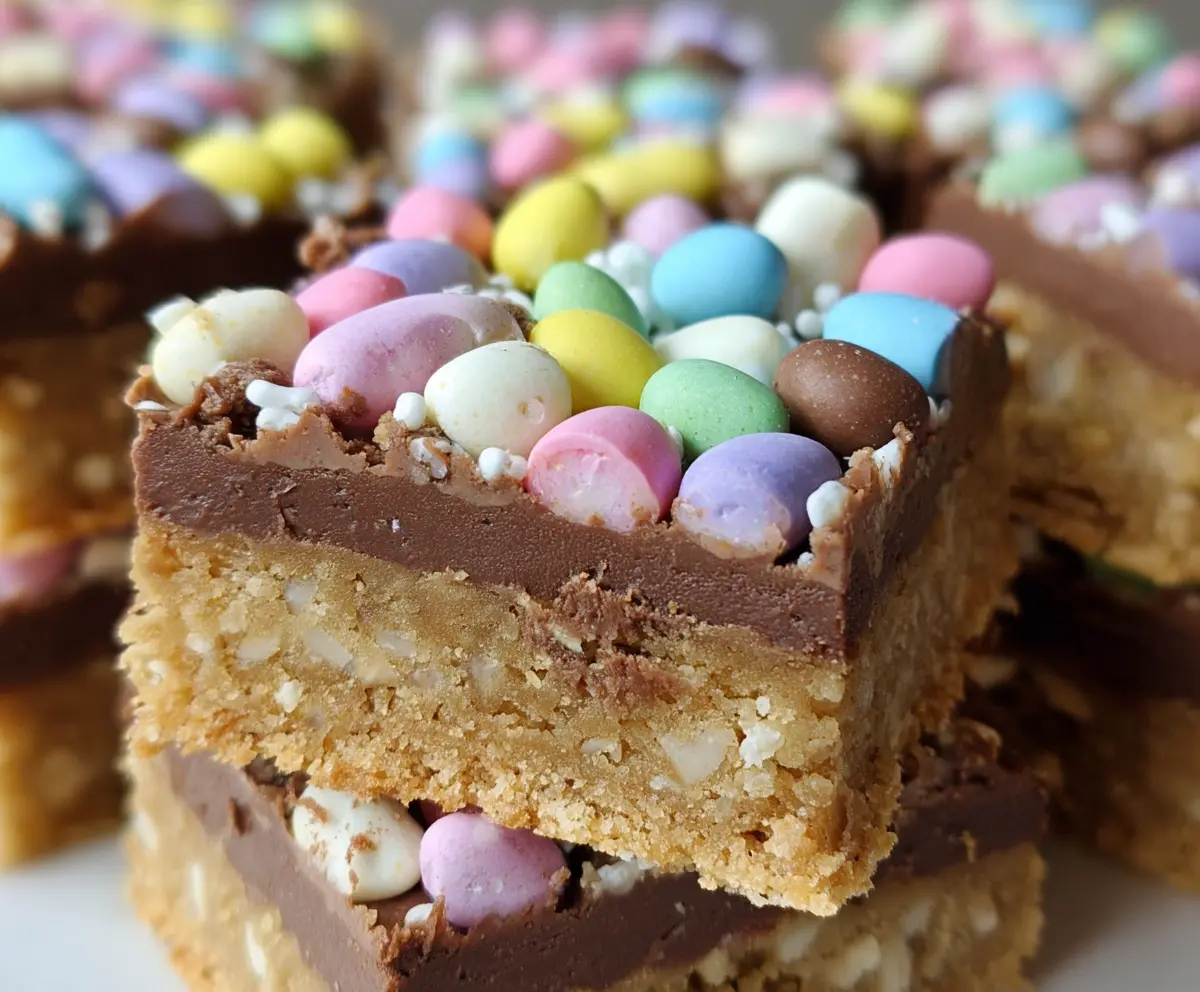
These Easter Goody Bars are a fun and delicious treat perfect for the holiday! With layers of chocolate, marshmallows, and colorful candy, they’re a sweet eye-catcher.
Making these bars is a breeze! Just mix, layer, and let them cool. I love cutting them into fun shapes for a festive twist. They really bring smiles to everyone’s faces! 😄
Key Ingredients & Substitutions
Crispy Rice Cereal: This is the base of your bars. Classic Rice Krispies work great, but if you’re feeling adventurous, try using other crunchy cereals like cornflakes or even puffed quinoa for a unique twist.
Mini Marshmallows: They bring that lovely chewy texture. If you’re looking to avoid them for any reason, you can use larger marshmallows, just cut them down to size.
Unsalted Butter: This adds richness. If you want it dairy-free, coconut oil can work as a substitute. It’ll give a slight coconut flavor that can be delightful!
Milk Chocolate Chips: For a sweeter option, these are ideal. Dark chocolate can be used for a richer taste, or even white chocolate if you prefer something sweeter.
Peanut Butter: While optional, it really ramps up the flavor. If allergies are a concern, almond butter or sunflower seed butter make excellent alternatives.
Pastel Candy-Coated Eggs: These add color and joy! You can swap these with other candies like M&M’s depending on the occasion.
How Can I Get My Bars to Hold Together Well?
Getting the right consistency is key for these bars to hold together. Here are some quick tips to help:
- Melt the butter and mini marshmallows slowly over low heat. Stir until completely smooth; this is your glue.
- Don’t skip pressing the mixture into the pan firmly. It helps compact everything nicely.
- Let them cool completely before cutting; this allows them to firm up even more.
- Refrigerating them for a couple of hours is essential. The cold really helps with setting.
With these tips, you’ll have beautiful, firm bars ready to enjoy! Happy baking!
How to Make Easter Goody Bars
Ingredients You’ll Need:
For the Base Layer:
- 3 cups crispy rice cereal (such as Rice Krispies)
- 2 cups mini marshmallows
- 3 tablespoons unsalted butter
- 1 teaspoon vanilla extract
For the Chocolate Layer:
- 1 1/2 cups milk chocolate chips
- 1/2 cup creamy peanut butter (optional)
For Decoration:
- 1 1/2 cups mini pastel candy-coated chocolate eggs (such as Cadbury Mini Eggs)
- 1/2 cup pastel mini marshmallows, chopped or whole
- Edible gold or pearl sprinkles (optional)
How Much Time Will You Need?
This delightful recipe will take about 15 minutes to prepare and 2 hours to chill in the fridge. So grab your ingredients and let’s get started!
Step-by-Step Instructions:
1. Prepare the Baking Pan:
First, line a 9×13 inch baking pan with parchment paper for easy removal, or lightly grease it with cooking spray to prevent sticking.
2. Make the Base Layer:
In a large saucepan, melt the butter over low heat. Once melted, add 1 cup of mini marshmallows and stir until they are fully melted and the mixture is smooth. This step is crucial for making a sticky mixture that holds everything together! Remove from heat and quickly stir in the vanilla extract.
3. Combine with Cereal:
Now, fold in the crispy rice cereal. Make sure all the cereal is coated well with the marshmallow mixture. This will create your base layer for the bars.
4. Press into the Pan:
Press half of the cereal mixture firmly and evenly into the bottom of your prepared pan. This will be the base that holds the delicious chocolate layer.
5. Prepare the Chocolate Layer:
In a microwave-safe bowl, combine the chocolate chips and peanut butter (if you’re using it). Microwave in 30-second intervals, stirring after each interval until the mixture is smooth and melted. This will create a rich chocolate layer that’s irresistible!
6. Assemble the Bars:
Spread the melted chocolate mixture evenly over the pressed cereal base layer. Then, take the remaining cereal mixture and press it evenly over the chocolate layer, just like you did for the first layer.
7. Add the Decorations:
Gently press the mini pastel candy-coated eggs and any chopped or whole pastel mini marshmallows into the top layer for a decorative touch. If you want to add a bit of sparkle, sprinkle edible gold or pearl sprinkles on top!
8. Chill and Slice:
Refrigerate the bars for at least 2 hours or until they are firm. Once set, lift the bars out of the pan using the parchment paper overhang. Cut into squares and serve.
9. Enjoy!
Your colorful Easter Goody Bars are now ready to be enjoyed! Perfect for sharing at gatherings or simply treating yourself. Happy Easter!
Can I Use Different Types of Chocolate?
Absolutely! While milk chocolate is delicious, feel free to use dark chocolate for a richer flavor or white chocolate for a sweeter alternative. Just make sure it’s a chocolate that melts well!
How Can I Make These Bars Gluten-Free?
To make these Easter Goody Bars gluten-free, simply use certified gluten-free crispy rice cereal. The rest of the ingredients are naturally gluten-free as long as you check for any gluten in your chocolate and marshmallows.
What’s the Best Way to Store Leftovers?
Store leftover bars in an airtight container at room temperature for up to 3 days. If you want to keep them longer, you can refrigerate them for about a week. Just make sure to separate layers with parchment paper to prevent sticking!
Can I Freeze These Bars?
Yes, you can freeze the bars! Once cut, place them in a single layer in a freezer-safe container with parchment paper between layers. They should keep well for up to 2 months. Just thaw them in the fridge overnight when you’re ready to enjoy!