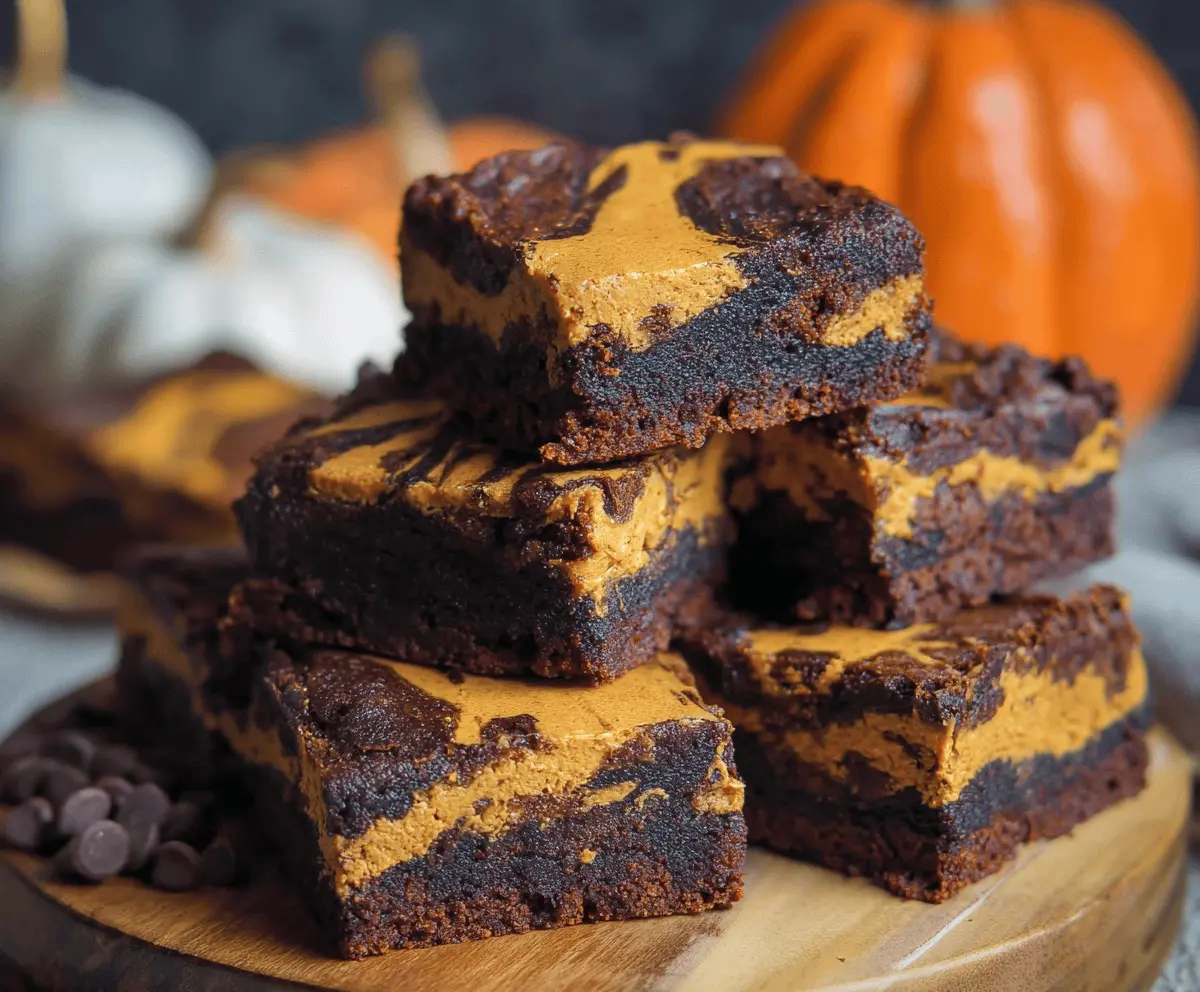
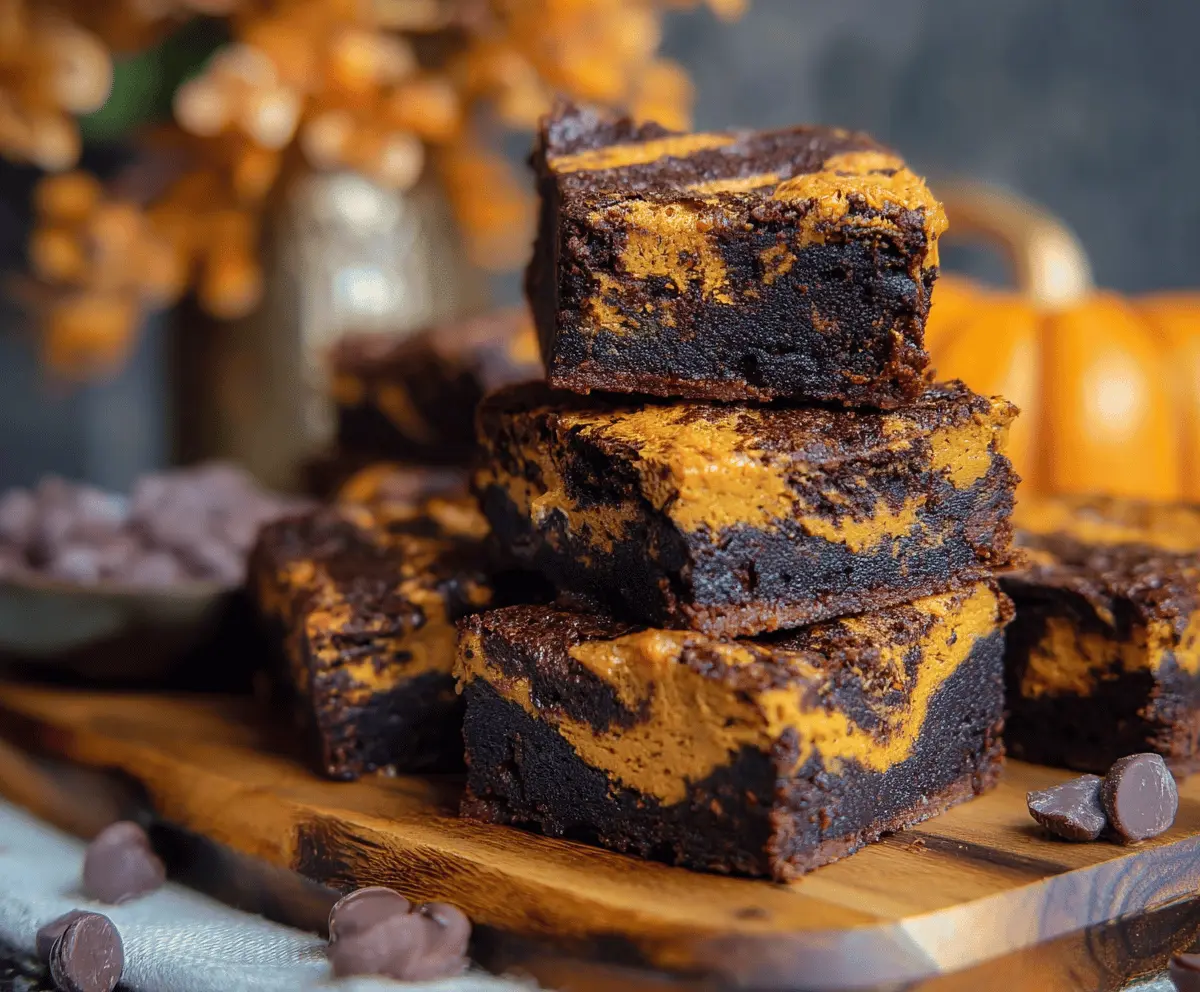
These pumpkin brownies are a yummy twist on the classic treat! They mix rich chocolate with cozy pumpkin spice, making them perfect for fall or any day you need a sweet pick-me-up.
I love how they taste like dessert but have that warm pumpkin vibe. Just don’t be surprised if you end up eating more than one—it’s hard to resist! 😉
Key Ingredients & Substitutions
Unsalted Butter: This adds richness to the brownies. If you’re looking for a dairy-free option, coconut oil can be a good substitute, though it may impart a hint of coconut flavor. I personally enjoy using butter for that classic taste!
Pumpkin Puree: Canned pumpkin is super convenient, but you can also use fresh pumpkin puree. Just roast and blend fresh pumpkin until smooth. It’s fun to make your own if you have the time!
Cocoa Powder: Dutch-process cocoa gives a deeper chocolate flavor, while natural cocoa powder is lighter. Each type offers a different taste, so feel free to use what you have on hand. I usually stick with Dutch-process for richness.
Spices: The mix of cinnamon, nutmeg, ginger, and cloves warms up these brownies wonderfully. If you want a shortcut, a pre-made pumpkin spice blend works well, too!
Chocolate Chips: These are optional but add extra chocolatey goodness! You can swap them for white chocolate chips or even nuts like walnuts for a different texture.
How Do I Create the Perfect Marble Effect?
Swirling the pumpkin and chocolate layers is where the magic happens! To achieve a beautiful marbled effect, follow these tips:
- After pouring the layers, use a knife or skewer to make gentle swirling motions from the center outwards. Be careful not to overmix, as you want to maintain distinct layers.
- Try to keep some of the batter visible; too much mixing can lead to a uniform color instead of a pretty marble.
- Pace yourself while swirling—just a few swipes is usually enough for that lovely blend!
With these steps, your brownies will look as good as they taste. Happy baking!
Delicious Pumpkin Brownies Recipe
Ingredients You’ll Need:
For the Brownie Batter:
- 1/2 cup (115g) unsalted butter, melted
- 1 cup (200g) granulated sugar
- 2 large eggs
- 1 teaspoon vanilla extract
- 1/3 cup (30g) cocoa powder
- 1/2 cup (65g) all-purpose flour
- 1/4 teaspoon salt
- 1/4 teaspoon baking powder
For the Pumpkin Layer:
- 1/2 cup pumpkin puree (canned or homemade)
- 1/4 cup granulated sugar (for the pumpkin layer)
- 1 teaspoon ground cinnamon
- 1/2 teaspoon ground nutmeg
- 1/4 teaspoon ground ginger
- 1/4 teaspoon ground cloves
Optional:
- Chocolate chips for extra chocolate richness
How Much Time Will You Need?
This recipe will take about 15 minutes of prep time and 30-35 minutes of baking. After that, let the brownies cool completely in the pan before cutting them into squares. So set aside roughly 1 hour for the whole process and 30 minutes for the cooling time!
Step-by-Step Instructions:
1. Preheat Your Oven:
Start by preheating your oven to 350°F (175°C). This helps create the perfect environment for those brownies to bake nicely. While it’s heating, lightly grease or line an 8×8 inch baking pan with parchment paper for easy removal later.
2. Make the Brownie Batter:
In a large bowl, mix the melted butter with 1 cup of granulated sugar until it’s well blended. Then, beat in the eggs and vanilla extract. You want the mixture to be smooth and creamy, so mix it well!
3. Combine Dry Ingredients:
In a separate bowl, whisk together the cocoa powder, all-purpose flour, salt, and baking powder. This helps to combine all the dry ingredients evenly, ensuring every bite has that rich chocolate flavor.
4. Combine Wet and Dry Ingredients:
Gradually add the dry ingredients to your wet mixture, stirring until fully incorporated. You’ll have a thick, fudgy brownie batter—yum!
5. Prepare the Pumpkin Layer:
In another bowl, combine the pumpkin puree with the remaining 1/4 cup of sugar, ground cinnamon, nutmeg, ginger, and cloves. Mix well to create a delightful pumpkin spice mixture. The aroma will be fantastic!
6. Layer Your Batter:
Now it’s time to put it all together! Pour half of the chocolate brownie batter into the prepared pan, spreading it evenly across the bottom. Next, add spoonfuls of the pumpkin mixture over the chocolate layer. Finally, pour the rest of the brownie batter on top of the pumpkin mixture.
7. Create a Swirled Effect:
Using a knife or skewer, gently swirl the pumpkin and chocolate layers together to create a beautiful marbled effect. Be careful not to overmix—just a few gentle strokes will do!
8. Optional Chocolate Chips:
If you want an extra chocolate kick, sprinkle some chocolate chips on top of the batter. They’ll melt slightly and add a delicious touch!
9. Bake the Brownies:
Place the pan in your preheated oven and bake for about 30-35 minutes. Keep an eye on them, and use a toothpick inserted into the center to check for doneness. If it comes out with a few moist crumbs, they’re perfect!
10. Cool and Serve:
Once baked, remove the brownies from the oven and let them cool completely in the pan. After cooling, you can cut them into squares. Serve these moist, fudgy pumpkin brownies and enjoy the delightful blend of chocolate and warm pumpkin spices!
These brownies are sure to be a hit, perfect for gatherings or just a cozy treat for yourself. Happy baking!
Can I Substitute the Pumpkin Puree with Something Else?
Yes! While pumpkin puree is essential for that signature flavor, you can use applesauce as a substitute for a similar texture. Just keep in mind that it will slightly alter the taste and sweetness of the brownies.
How Do I Store Leftover Brownies?
Store any leftover brownies in an airtight container at room temperature for up to 3 days. If you want them to last longer, you can refrigerate them for about a week. Just remember to let them come back to room temperature before enjoying, for the best flavor!
Can I Freeze These Brownies?
Absolutely! Once they’re completely cooled, you can wrap the brownies tightly in plastic wrap and then place them in a freezer-safe container. They’ll keep well in the freezer for up to 3 months. Thaw them in the fridge overnight when you’re ready to enjoy them again!
Can I Add Nuts or Other Mix-Ins?
Of course! Chopped walnuts, pecans, or even dried fruit can add a nice crunch and flavor to the brownies. Just fold them into the batter along with the dry ingredients for even distribution. Enjoy experimenting with different mix-ins!