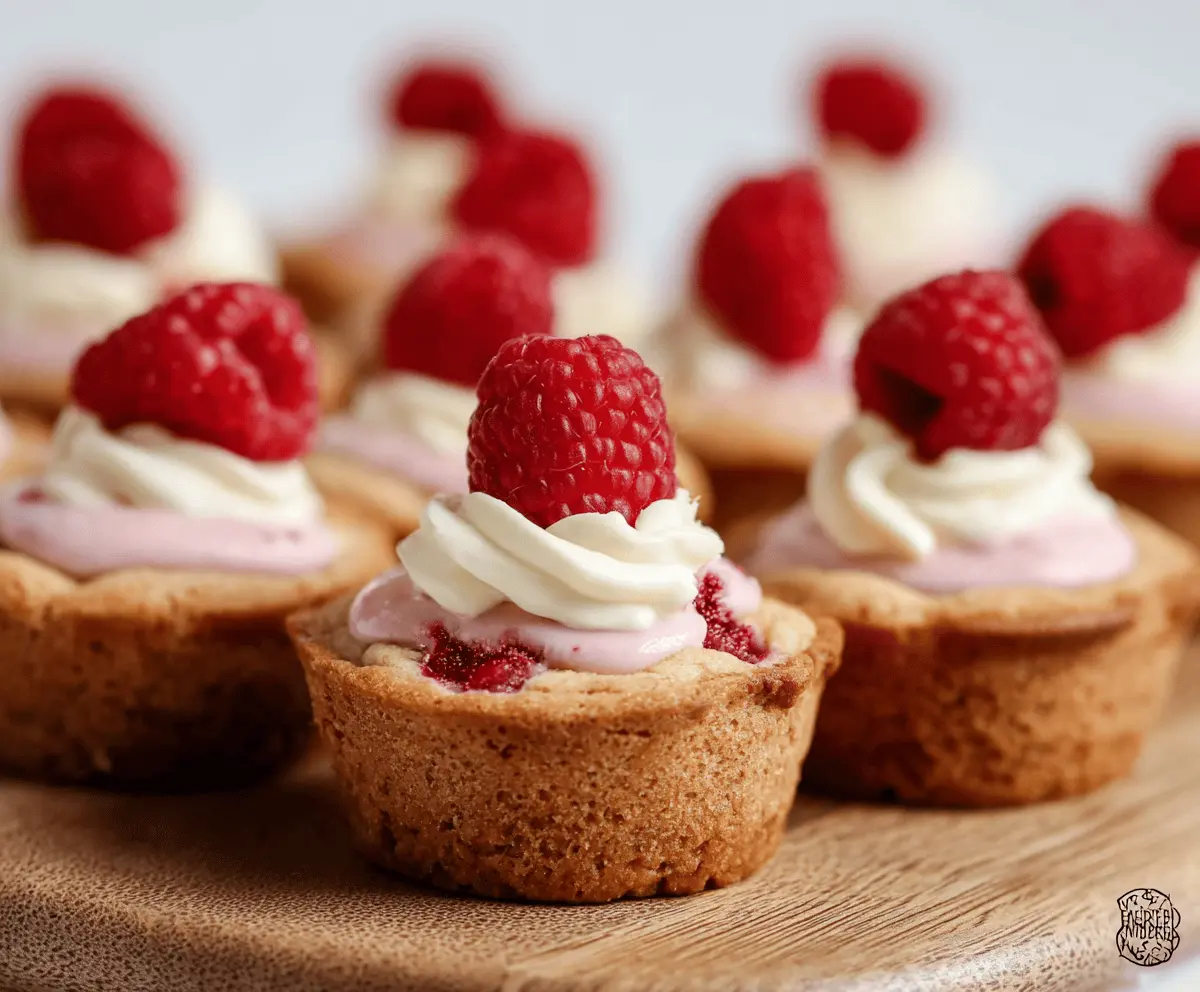
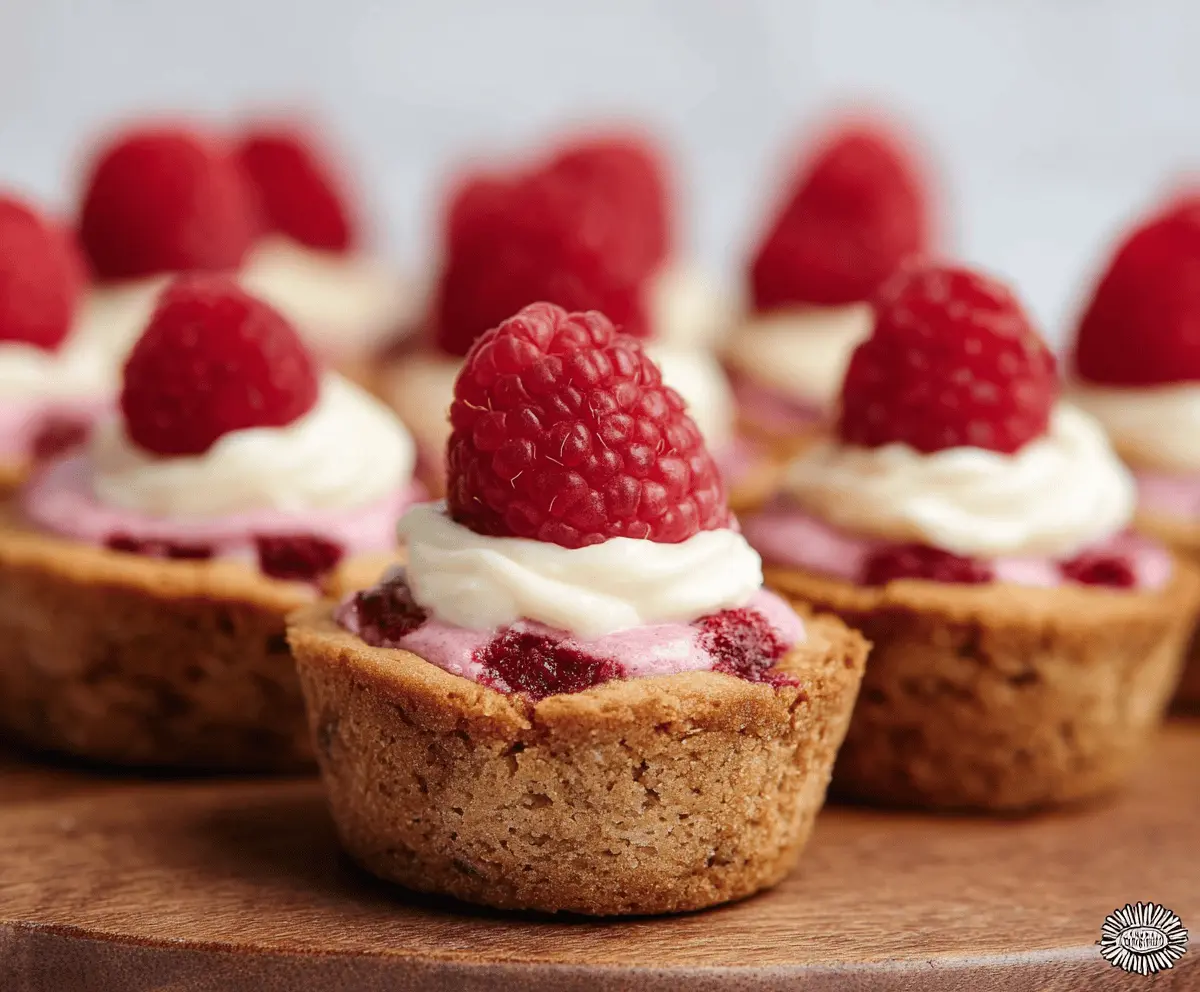
These Raspberry Cheesecake Cookie Cups are a sweet treat that combines soft cookie cups with creamy cheesecake and fresh raspberries. They’re like little bites of happiness!
What’s better than cookies? Cookies filled with cheesecake, of course! I love how easy these are to share—just don’t forget to save one for yourself! 😋
Making these cups is fun! Just bake the cookie base, add your cheesecake filling, and pop on a raspberry. They are perfect for parties or a cozy night in!
Key Ingredients & Substitutions
Unsalted Butter: This is important for controlling the salt balance in your cookie cups. If you only have salted butter, simply reduce added salt by a pinch.
Granulated & Brown Sugar: Both sugars add sweetness and a slight chewiness. You can use all brown sugar for a richer flavor or coconut sugar as a healthier alternative.
All-Purpose Flour: The base of your cookie cups! Make it gluten-free by replacing it with a 1:1 gluten-free blend for similar results.
Cream Cheese: A must for that cheesecake flavor. Greek yogurt can be a lighter substitute if you’re looking for something less rich, but it may alter the texture slightly.
Raspberries: Fresh is best, but feel free to use frozen raspberries. Just make sure to thaw and drain them before using to avoid wet filling.
How do I get Perfectly Shaped Cookie Cups?
The cookie cup shaping is key to success here! After blending your ingredients, scoop about 1 1/2 tablespoons of dough into each muffin tin. Don’t worry if they’re not perfect; they will spread and shape during baking.
- Press the dough down with your fingers or a small spoon, ensuring you create enough space for the filling.
- Bake until the edges are golden brown; this will help them hold their shape.
- Let them cool slightly before removing—this keeps them from breaking apart.
Enjoy shaping your cookie cups; the results will be as delightful to look at as they are to eat!
Raspberry Cheesecake Cookie Cups
Ingredients:
For the Cookie Cups:
- 1 cup unsalted butter, softened
- 3/4 cup granulated sugar
- 3/4 cup brown sugar, packed
- 2 large eggs
- 2 teaspoons vanilla extract
- 2 1/4 cups all-purpose flour
- 1 teaspoon baking soda
- 1/2 teaspoon salt
For the Cheesecake Filling:
- 8 oz cream cheese, softened
- 1/3 cup powdered sugar
- 1 teaspoon vanilla extract
- 1/2 cup heavy whipping cream
For the Raspberry Topping:
- 1 cup fresh raspberries
- Additional whipped cream for garnish (optional)
How Much Time Will You Need?
This scrumptious recipe requires about 25 minutes for preparation and 12 minutes for baking. You’ll want to chill the finished cookie cups for at least 30 minutes before serving, bringing your total time to around 1 hour and 7 minutes. Totally worth the wait!
Step-by-Step Instructions:
1. Prepare the Cookie Cups:
First, preheat the oven to 350°F (175°C). Grease a mini muffin tin or line it with mini cupcake liners to keep your cups from sticking.
In a large mixing bowl, cream together the softened butter, granulated sugar, and brown sugar until the mixture is light and fluffy. This will take a few minutes, so be patient!
Add the eggs one at a time, mixing well after each addition. Stir in the vanilla extract for a yummy flavor.
In another bowl, whisk together the flour, baking soda, and salt. Gradually mix these dry ingredients into the wet ingredients until just combined.
Now for the fun part! Scoop about 1 1/2 tablespoons of this cookie dough into each mini muffin cup. Using your fingers or the back of a small spoon, gently press down the dough and shape it up the sides to form little cookie cups with wells in the center.
Bake in the preheated oven for about 10-12 minutes, or until the edges are golden brown and the centers are set. Once done, let the cookie cups cool in the tin for about 5 minutes, then gently remove them and transfer to a wire rack to cool completely.
2. Make the Cheesecake Filling:
While the cookie cups are cooling, let’s whip up the cheesecake filling! In a medium bowl, beat the softened cream cheese until it’s nice and smooth. Add in the powdered sugar and vanilla extract, and continue beating until everything is creamy and combined.
In a separate bowl, whip the heavy cream until stiff peaks form. This means your cream will hold its shape! Gently fold the whipped cream into the cream cheese mixture until it’s all smooth and fluffy. So good!
3. Assemble the Raspberry Cheesecake Cookie Cups:
Once your cookie cups are completely cooled, it’s time to fill them up! Spoon or pipe a dollop of the cheesecake filling into each cup.
Top each with a few fresh raspberries or place one raspberry on top for a pretty presentation. If you want, you can even pipe a swirl of whipped cream on top for an extra touch.
4. Chill and Serve:
To make sure everything sets nicely, refrigerate the assembled cookie cups for at least 30 minutes before serving. This will help the filling firm up a bit.
When you’re ready to enjoy, serve them chilled and indulge in these delightful treats!
Enjoy the creamy, fluffy goodness with the tartness of fresh raspberries—all encased in a delicious cookie cup. Perfect for sharing or keeping all to yourself!
Can I Use Different Berries for the Topping?
Absolutely! While raspberries add a lovely tartness, you can use blueberries, strawberries, or blackberries instead. Just make sure they’re fresh and add a similar flavor balance!
Can I Make These Cookie Cups Gluten-Free?
Yes! To make gluten-free cookie cups, simply substitute the all-purpose flour with a 1:1 gluten-free baking blend. Make sure it contains xanthan gum for best results!
How Should I Store Leftovers?
Store any leftover cookie cups in an airtight container in the refrigerator for up to 3 days. They are best enjoyed cold, but you might want to let them sit at room temperature for a few minutes for the best flavor.
Is It Possible to Make the Cheesecake Filling Ahead of Time?
Yes, you can! Prepare the cheesecake filling a day in advance and store it in the fridge. Just fill the cookie cups right before serving for the freshest taste!