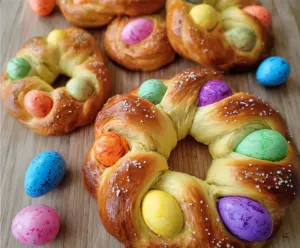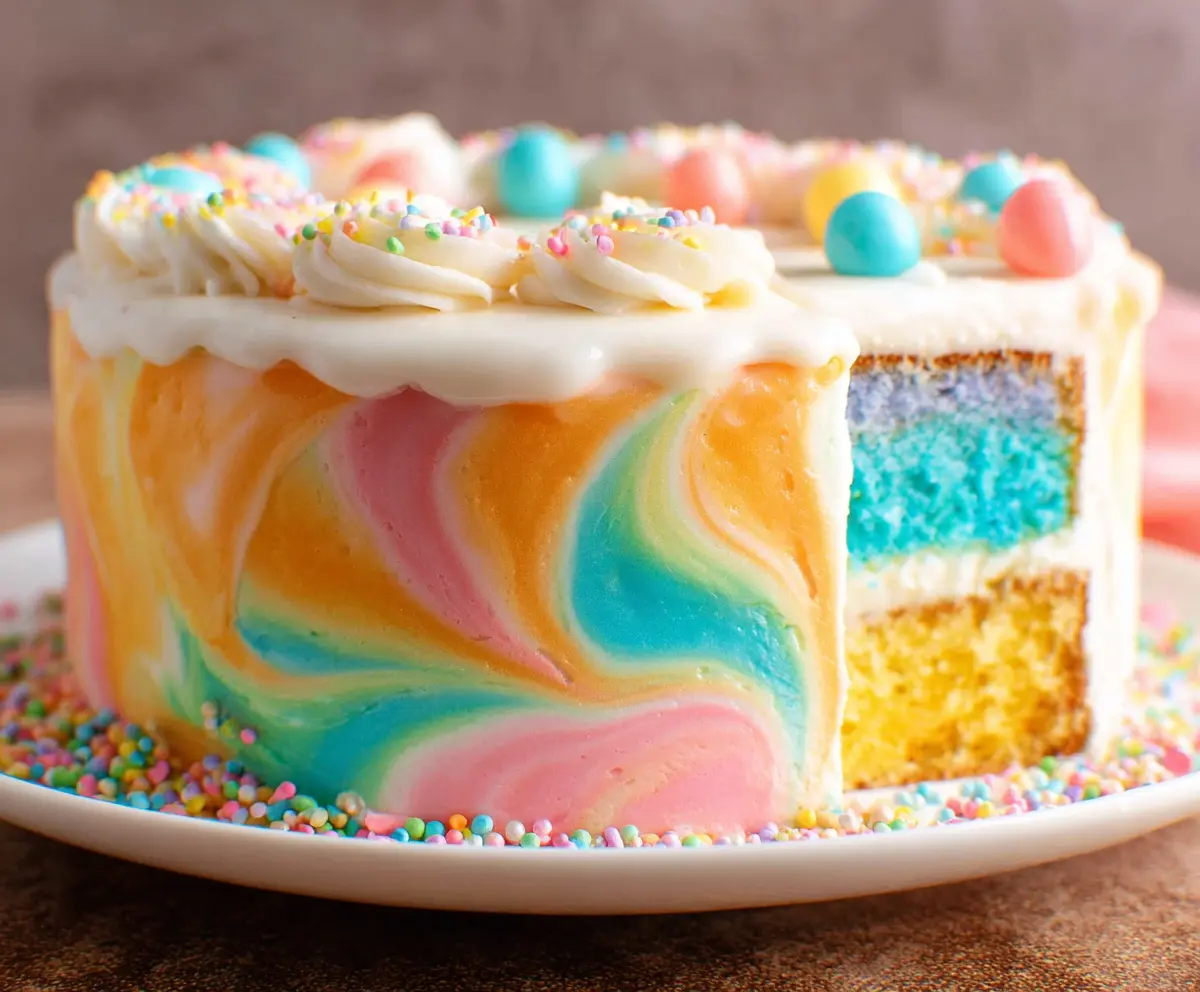
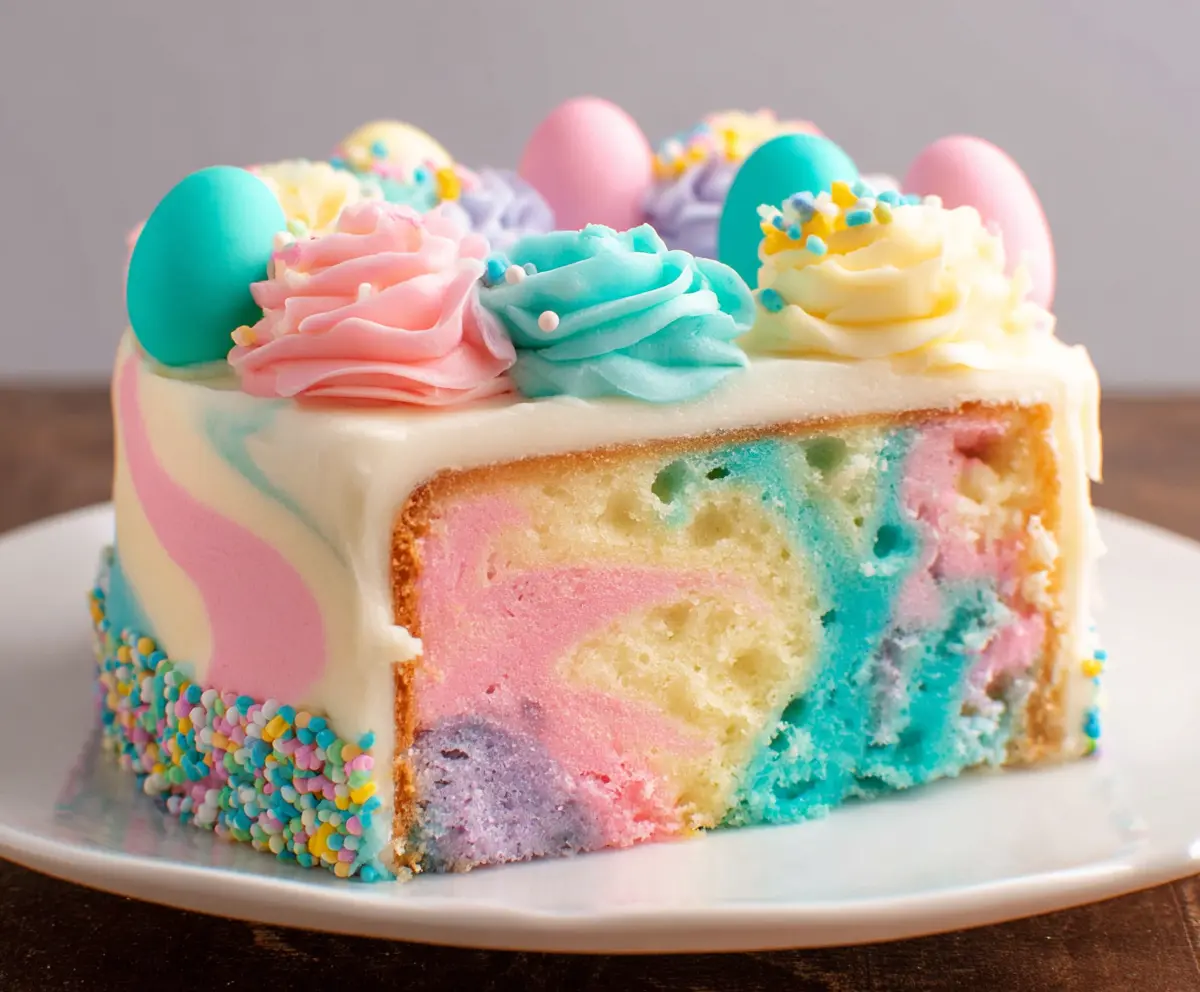
This Swirled Easter Cake is a fun treat that’s perfect for spring celebrations! With colorful layers of cake, it’s as tasty as it is pretty. Just imagine the smiles when you cut into it!
I love how easy it is to make the swirls. Just mix, pour, and let the colors show off! It’s not just a cake; it brings joy to any table—even if you sneak a slice before dinner! 🎉
Key Ingredients & Substitutions
All-Purpose Flour: This flour gives the cake structure. You can use cake flour for a lighter texture or gluten-free all-purpose flour if needed. Keep in mind the texture may vary with gluten-free options.
Unsalted Butter: Using unsalted butter allows you to control the saltiness. If you’re in a pinch, you can use salted butter but reduce any added salt in the recipe by half.
Granulated Sugar: This sweetens the cake and adds moisture. You could substitute with a sugar alternative like coconut sugar for a healthier option, but the cake’s sweetness might differ slightly.
Food Coloring: The recipe calls for gel food colors for vibrant hues. If you have liquid food coloring, that’s fine, but start with less as it’s less concentrated.
Heavy Cream: This adds richness to the frosting. If you’re looking for a lighter option, you can substitute half-and-half or even full-fat coconut milk for a dairy-free version.
How Do You Achieve a Beautiful Marbled Effect?
Creating a marbled effect is all about how you layer and swirl the colors. Here’s how to do it:
- After dividing the batter, add your chosen food color to each bowl, mixing gently.
- Pour different colored batter into the pans in a random or layered pattern.
- Use a toothpick or skewer to gently swirl the colors. Don’t overdo it; you want distinct swirls, not a uniform color.
- Bake as directed! This will set your beautiful design in the cake.
Take your time with the swirling to get the marbled look just right. It makes the cake so visually appealing! Enjoy the process!
Swirled Easter Cake Recipe
Ingredients You’ll Need:
For the Cake:
- 3 cups all-purpose flour
- 2 ½ tsp baking powder
- ½ tsp salt
- 1 cup unsalted butter, softened
- 1 ¾ cups granulated sugar
- 4 large eggs
- 1 tbsp vanilla extract
- 1 cup whole milk
- Food coloring (blue, pink, yellow, purple)
For the Frosting:
- 1 cup unsalted butter, softened
- 4 cups powdered sugar, sifted
- ½ cup heavy cream
- 2 tsp vanilla extract
- Pinch of salt
For Decoration:
- Edible pastel-colored candy eggs
- Multi-colored round sprinkles
How Much Time Will You Need?
This delightful cake requires about 20 minutes of prep time and around 30-35 minutes of baking time. Don’t forget to chill the cake for another 30 minutes after decorating for a perfect finish, bringing your total time to about 1.5 hours before serving. Easy, fun, and festive!
Step-by-Step Instructions:
1. Prepare the Cake Batter:
First things first, preheat your oven to 350°F (175°C). Prepare two 8-inch round cake pans by greasing and flouring them. In a medium bowl, whisk together the flour, baking powder, and salt. In a larger bowl, cream the softened butter and sugar together using an electric mixer until the mixture is light and fluffy—this should take about 3-4 minutes. Add the eggs one at a time, making sure to beat well after each addition. Mix in the vanilla extract. Now, gradually add the dry ingredients and milk to the butter mixture, starting and finishing with the flour. Be gentle as you mix, just until everything is combined!
2. Divide and Color the Batter:
Next, evenly split the batter into four separate bowls. Add a few drops of food coloring to each bowl—blue, pink, yellow, and purple—stirring gently until the color is evenly distributed. This will give you a beautiful, colorful batter!
3. Bake the Cakes:
Now for the fun part! Pour the colored batters into the prepared pans, swirling or layering them side by side to create a marbled effect. You can use a toothpick or skewer to swirl the colors together gently to form a lovely pattern. Bake in your preheated oven for 30-35 minutes, or until a toothpick inserted in the center comes out clean. Once baked, let the cakes cool in their pans for about 10 minutes before transferring them to wire racks to cool completely.
4. Make the Frosting:
While your cakes cool, let’s whip up the frosting! Start by beating the softened butter on medium speed until creamy. Gradually add the powdered sugar, alternating with the heavy cream, and mix on low speed until everything is combined. Add the vanilla extract and a pinch of salt. Increase your mixer speed to high and whip for about 3-4 minutes, or until the frosting is light and fluffy.
5. Assemble the Cake:
Once the cakes are cool, if needed, level them with a cake leveler or knife. Place one cake layer on a serving plate and spread an even layer of frosting over the top. Carefully place the second layer on top. For a neat finish, apply a thin crumb coat of frosting around the entire cake, then pop it in the fridge for 15-20 minutes to chill. This helps to set the frosting!
6. Decorate the Cake:
After chilling, remove the cake from the fridge and use the remaining frosting to coat the entire cake fully. With a spatula or piping bag, create decorative swirls using the pastel colors in the frosting if desired. You might choose to mix in small amounts of food coloring for that layered effect. Pipe rosettes around the top edge of the cake, sprinkle multi-colored round sprinkles everywhere, and add those lovely pastel-colored candy eggs on top of the rosettes for that final touch!
7. Serve:
Chill your beautifully decorated cake for another 30 minutes to let the frosting set perfectly. Then, slice up that delightful Swirled Easter Cake and enjoy! It’s sure to bring smiles to everyone celebrating Easter!
Happy baking, and enjoy your vibrant, festive creation!
Can I Use A Different Type of Flour?
Yes! You can substitute all-purpose flour with cake flour for a lighter texture. If you’re looking for a gluten-free option, gluten-free all-purpose flour works as well, though the texture may vary slightly.
How Do I Store Leftover Cake?
Store any leftover cake in an airtight container at room temperature for up to 3 days. If you prefer, you can refrigerate it to extend freshness, which will keep it tasty for up to a week!
Can This Cake Be Made Ahead of Time?
Absolutely! You can bake the cake layers up to two days in advance. Just wrap them tightly in plastic wrap and store them in the fridge. Frost them on the day you plan to serve to keep everything fresh!
What If I Don’t Have Heavy Cream for the Frosting?
No worries! You can substitute heavy cream with half-and-half or even full-fat coconut milk for a lighter option. The frosting will still be deliciously creamy!