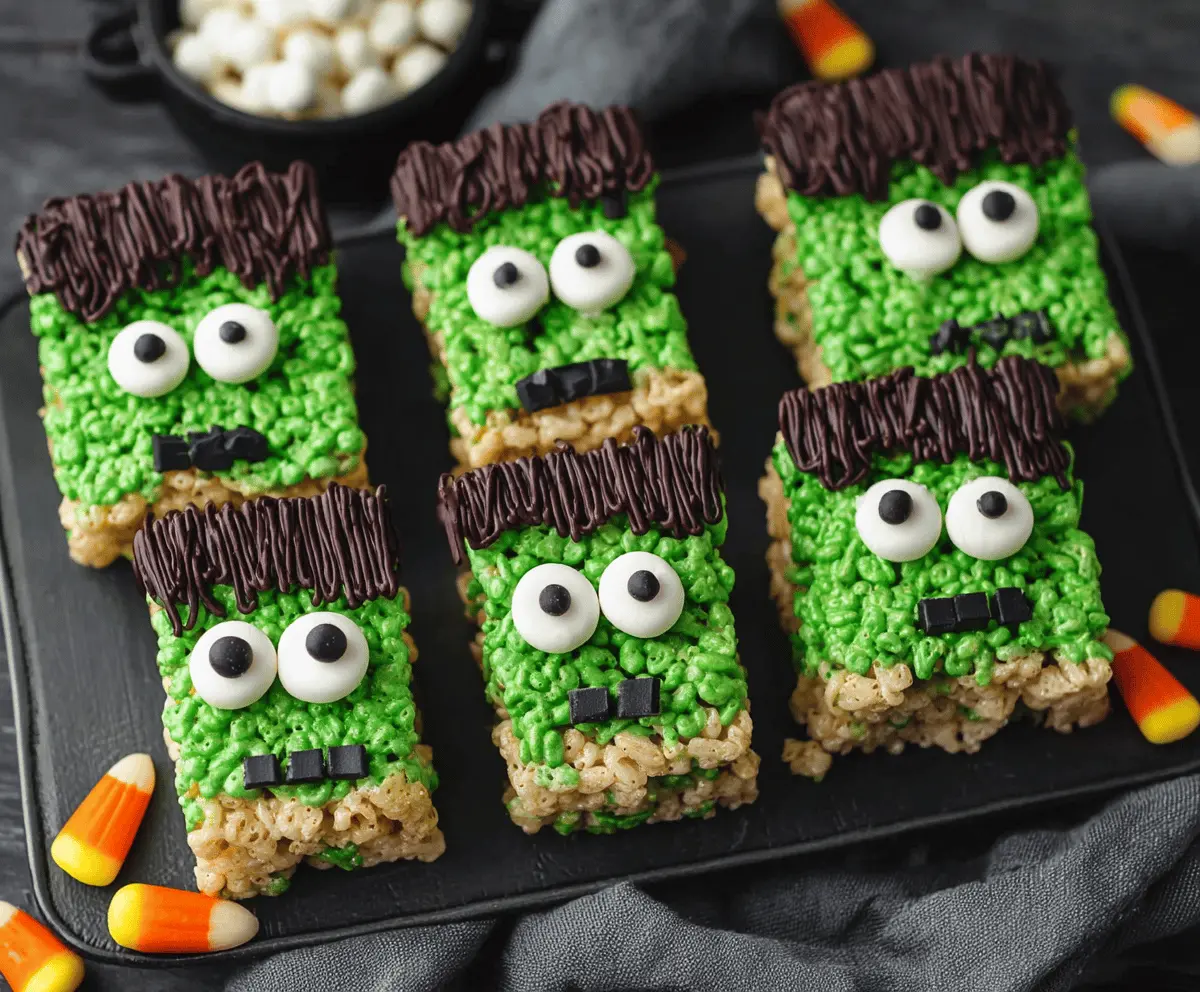
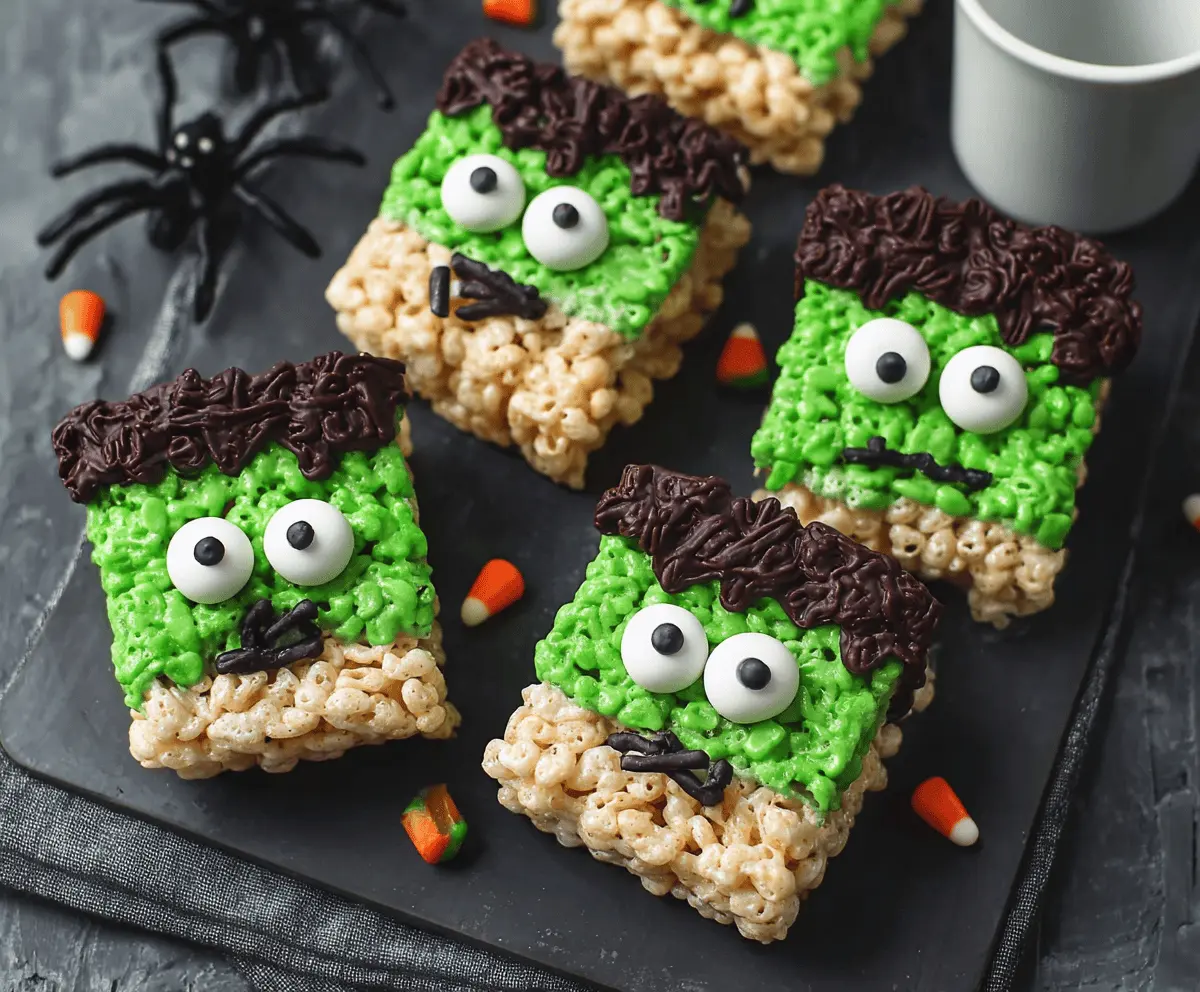
These spooky Frankenstein Rice Krispie Treats are a fun twist on the classic snack! Made with gooey marshmallows, crispy rice cereal, and bright green chocolate, they’re perfect for Halloween parties!
Making these treats is a blast! Kids love helping out, especially when it’s time to decorate them with eyes and chocolate features. Trust me, they’ll disappear faster than you can say “Frankenstein”! 🎃
Key Ingredients & Substitutions
Rice Krispies Cereal: This gives that classic crunchy texture. If you can’t find it, you can use any puffed rice cereal or a gluten-free alternative if needed.
Mini Marshmallows: These are perfect for creating that gooeyness. If you have large marshmallows, you can cut them down. Make sure to count them; about 10 large marshmallows equals 4 cups of mini ones.
Green Food Coloring: This is essential for the Frankenstein look. If you’re looking for a natural option, beet juice or spirulina powder can be used, but they might change the flavor slightly.
Candy Melts: These make decoration easy! If you can’t find candy melts, white chocolate chips will work too, but you may need to add a bit of coconut oil to help smooth it out.
Edible Candy Eyes: For the eyes, any type of candy eyeballs will do. You can even use small chocolate chips if you can’t find anything else.
How Do You Get the Perfect Green Color?
Getting that vibrant green color is key to making Frankenstein Rice Krispie Treats look fun! Here’s how to do it:
- Start with a few drops of green food coloring and mix it into the melted marshmallows.
- Stir well to make sure the color is evenly distributed. It’s easier to add more color than to take it out, so go slowly!
- After adding the food coloring, it should be a bright, cheerful green—think of Frankenstein’s classic look!
What’s the Best Way to Shape the Treats?
Shaping the treats into Frankenstein’s face can be simple! Here’s what to keep in mind:
- After mixing in the Rice Krispies, quickly transfer the mixture to a greased baking dish. Press down firmly to ensure they’re compact.
- Let it cool fully before cutting; this helps keep the shapes clean and makes decorating easier.
- Use a sharp knife and try to cut straight lines to form rectangles. You can even use cookie cutters for fun shapes!
These tips will help you create an eye-catching and delightful treat that’s sure to impress everyone this Halloween! Enjoy your Halloween baking!
Frankenstein Rice Krispie Treats
Ingredients You’ll Need:
- 6 cups Rice Krispies cereal
- 4 cups mini marshmallows
- 3 tablespoons unsalted butter
- Green food coloring
- 1 cup white candy melts or white chocolate chips
- Black candy melts or black decorating gel (for hair and facial features)
- Edible candy eyes
- Black licorice strips or black fondant (for mouths and bolts)
- Candy corn (optional, for decoration)
Time Needed:
This fun recipe takes about 20 minutes of prep time and an additional 10-15 minutes for cooling and decorating. Overall, you’ll have your spooky treats ready in under an hour!
Step-by-Step Instructions:
1. Melt the Butter and Marshmallows:
Start by placing a large pot on low heat. Add the unsalted butter and let it melt gently. Once it’s melted, toss in the mini marshmallows and stir continuously with a spatula. Keep stirring until the marshmallows are completely melted and smooth.
2. Add the Green Food Coloring:
Remove the pot from heat and take a moment to brighten up your marshmallow mix! Add several drops of green food coloring. Stir well until the color is vibrant and even. Feel free to add more if you want a brighter green shade!
3. Mix in the Rice Krispies:
Now it’s time to add the fun! Quickly pour in the Rice Krispies cereal and use a spatula to fold it into the melted marshmallow mixture. Make sure all the cereal is evenly coated.
4. Shape the Treats:
Next, transfer the mixture into a greased baking dish. Use your hands or a spatula to press it down firmly into an even layer. Allow it to cool completely on the counter—this usually takes about 30 minutes.
5. Cut into Shapes:
Once cooled, take a sharp knife and cut the treats into rectangles. Aim to create faces that resemble Frankenstein! You can even make them slightly taller for more character.
6. Prepare the Decorations:
In a microwave-safe bowl, melt the white candy melts or white chocolate chips until smooth. This will act as Frankenstein’s eyes! Dip the edible candy eyes into the melted mixture and place them on the green part of each treat.
7. Add Hair and Features:
Now for the fun part! Use the black candy melts or decorating gel to pipe hair along the top edge of each treat. Get creative with the styles to give each one a unique look!
8. Attach the Mouths and Bolts:
Cut small pieces of black licorice or black fondant to create mouths and bolts. Carefully attach these to each treat, giving your Frankenstein faces some personality!
9. Let the Treats Set:
Allow all the decorations to set completely before serving. You can place them in the fridge for a few minutes if you want to speed things up!
10. Optional Fun:
For a fun presentation, serve your Frankenstein Rice Krispie Treats surrounded by candy corn or other Halloween-themed sweets!
Enjoy your playful and festive Frankenstein Rice Krispie Treats this Halloween! They are sure to be a hit with kids and adults alike!
Can I Use Different Cereal for This Recipe?
Absolutely! While Rice Krispies give that classic texture, you can substitute with any puffed rice cereal. Just make sure it’s similar in size for even distribution in the marshmallow mixture!
How to Store Leftover Treats?
Store any leftover treats in an airtight container at room temperature for up to 3 days. If you’d like them to last longer, you can refrigerate them, but they might become a bit firmer. Just let them sit at room temperature for a few minutes before enjoying!
Is There a Way to Make These Gluten-Free?
Yes! Simply use gluten-free Rice Krispies, which are available in most grocery stores. Just check the label to ensure they meet your needs!
Can I Make These Ahead of Time?
Definitely! You can prepare and decorate these Rice Krispie Treats a day in advance. Just be sure to store them properly in an airtight container to keep them fresh.


