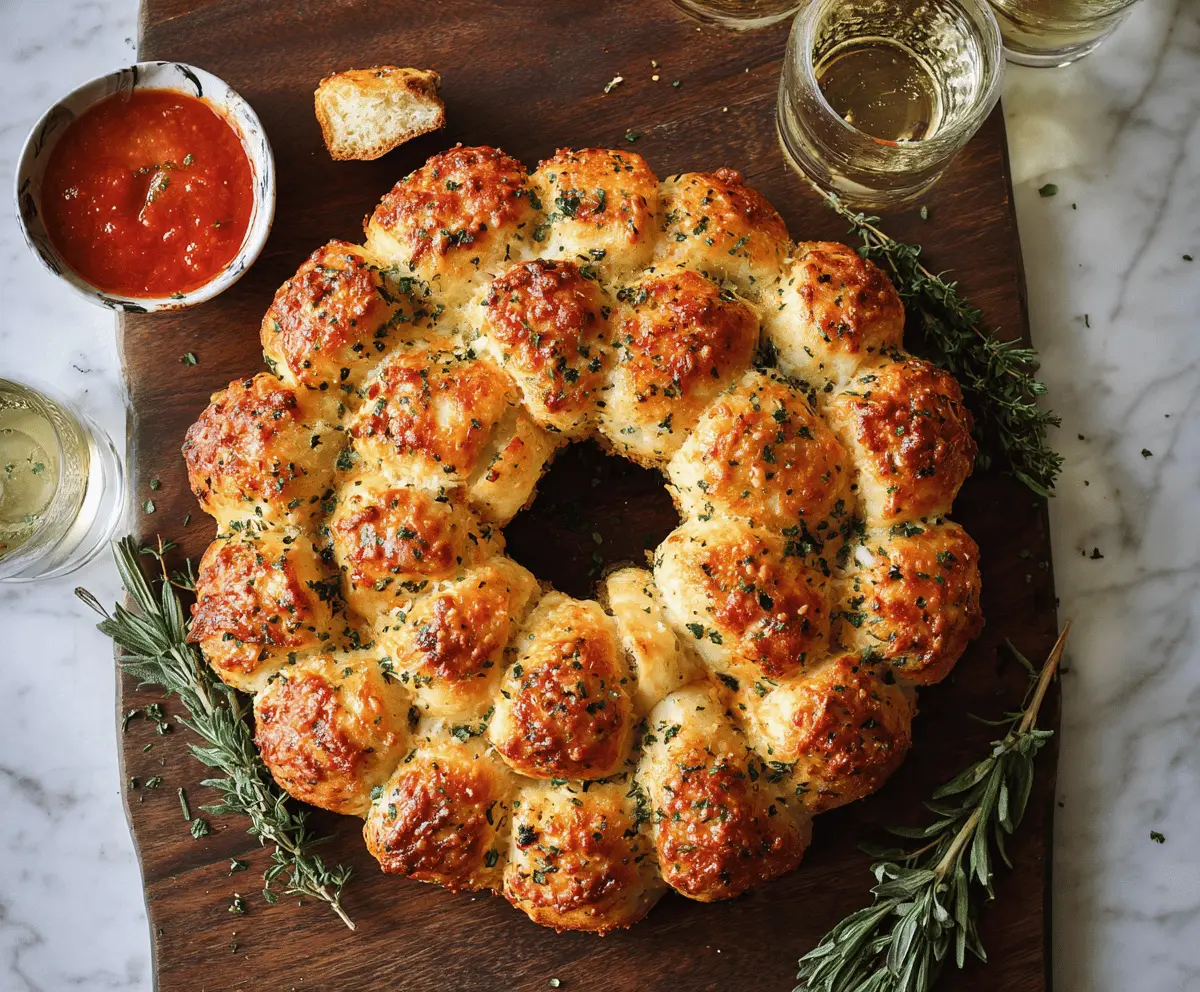

This Cheesy Garlic Pull-Apart Wreath is a fun and tasty dish! With warm, fluffy dough, gooey cheese, and a hint of garlic, it’s sure to be a hit at any gathering.
Picture the delight on everyone’s faces as they pull apart each piece! I love serving it fresh out of the oven with a side of marinara for dipping—so good! 🧄🧀
Key Ingredients & Substitutions
Active Dry Yeast: This is what helps the dough rise. If you’re out of it, you can use instant yeast in the same amount. Just mix it directly into the flour for ease.
Flour: All-purpose flour works great here. If you need a gluten-free option, try using a gluten-free all-purpose blend, but the texture may vary slightly.
Cheese: I love using mozzarella for its meltiness! For a twist, mix in some cheddar or pepper jack for added flavor. If you’re lactose intolerant, try dairy-free shredded options instead.
Butter: Unsalted butter is best since it allows you to control the salt level. If you’re dairy-free, use olive oil or a plant-based butter alternative.
Fresh Herbs: Fresh parsley is a nice choice for flavor—dried parsley works too. If you have dried basil or thyme, these can add a different taste. Feel free to experiment!
How Do I Knead Dough Properly?
Kneading is essential for developing gluten, which gives the bread its structure. Here’s how to do it perfectly:
- Dust your work surface lightly with flour to prevent sticking.
- Push the dough away from you using the heel of your hand.
- Fold the dough back over itself and give it a quarter turn.
- Repeat this process for about 8-10 minutes until the dough is smooth and elastic.
A good tip is to check if the dough passes the “windowpane test.” Stretch a small piece of dough; if it forms a thin, see-through sheet without tearing, you’re good to go!

Cheesy Garlic Pull-Apart Wreath
Ingredients You’ll Need:
For the Dough:
- 2 1/4 teaspoons (1 packet) active dry yeast
- 1 cup warm water (about 110°F/45°C)
- 2 tablespoons sugar
- 3 cups all-purpose flour
- 1 teaspoon salt
- 2 tablespoons olive oil
For the Filling:
- 2 cups shredded mozzarella cheese
- 1/2 cup grated Parmesan cheese
For the Garlic Butter:
- 4 tablespoons unsalted butter, melted
- 4 cloves garlic, minced
- 2 tablespoons fresh parsley, finely chopped (or 1 tablespoon dried parsley)
- 1 teaspoon dried oregano (optional)
For Serving:
- Marinara sauce, for dipping
Time Needed:
This delicious pull-apart wreath will take you about 15 minutes to prepare, plus 1 hour for the dough to rise. After that, it will bake for about 25-30 minutes. So, in total, expect to spend about 1 hour and 45 minutes before you can dig into this cheesy goodness!
Step-by-Step Instructions:
1. Activate the Yeast:
In a small bowl, combine the warm water, sugar, and yeast. Stir gently and let it sit for 5-10 minutes until it becomes foamy on top. This means your yeast is alive and ready to go!
2. Make the Dough:
In a large mixing bowl, mix together the flour and salt. Add the foamy yeast mixture and the olive oil. Stir until a shaggy dough forms.
3. Knead the Dough:
Flour your work surface and turn out the dough. Knead it for about 8-10 minutes until it feels smooth and elastic. Place the dough in a greased bowl, cover it with a clean towel, and let it rise in a warm spot for about 1 hour or until it has doubled in size.
4. Prepare for Baking:
Preheat your oven to 375°F (190°C). Lightly grease a 10-inch round baking pan or line it with parchment paper. This will make it easier to remove the wreath later!
5. Form the Dough Balls:
Once the dough has risen, punch it down gently to release the air. Divide it into about 20 equal pieces, forming small balls (around 1-inch in size).
6. Create the Garlic Butter Mixture:
In a small bowl, mix the melted butter with the minced garlic, chopped parsley, and oregano. This will give your wreath a tasty, garlicky flavor!
7. Fill and Dip the Dough Balls:
Flatten each dough ball slightly. Place a small pinch of mozzarella and Parmesan cheese in the center, then pinch the edges to seal and shape back into a ball. Next, dip each cheese-filled ball into the garlic butter mixture.
8. Arrange in the Pan:
Place the dipped dough balls side by side in the prepared baking pan, creating a wreath shape with a hole in the center. Don’t worry if they’re touching; they’ll rise together!
9. Bake the Wreath:
Brush any leftover garlic butter over the top of the dough balls for extra flavor. Bake in the preheated oven for 25-30 minutes until golden brown on top and the cheese is melted inside.
10. Cool and Serve:
Remove from the oven and let the wreath cool for a few minutes. Then, serve it warm with marinara sauce for dipping. Enjoy pulling apart each cheesy, garlicky piece!
This pull-apart wreath is perfect for any gathering, making it a delightful appetizer or snack that’s sure to impress!
Can I Use Store-Bought Dough Instead?
Absolutely! If you’re short on time, feel free to use pre-made pizza or biscuit dough. Just follow the instructions for filling and baking, adjusting the cooking time as needed based on the package instructions.
What Can I Substitute for Mozzarella Cheese?
If mozzarella isn’t your favorite, you can substitute it with any cheese that melts well, like provolone, fontina, or even a sharp cheddar for a richer flavor. Just keep in mind that the texture will change slightly!
How Do I Store Leftovers?
Store any leftover pull-apart wreath in an airtight container at room temperature for up to 2 days or in the refrigerator for up to 5 days. To reheat, pop it in the oven at 350°F (175°C) for about 10-15 minutes or until warmed through.
Can I Freeze the Dough or Wreath?
Yes! You can freeze the dough after kneading it. Wrap it tightly in plastic wrap and store it in a freezer bag for up to 3 months. When you’re ready to use it, thaw overnight in the fridge before letting it rise. You can also freeze the baked wreath; just ensure it cools completely before wrapping it to maintain freshness.


