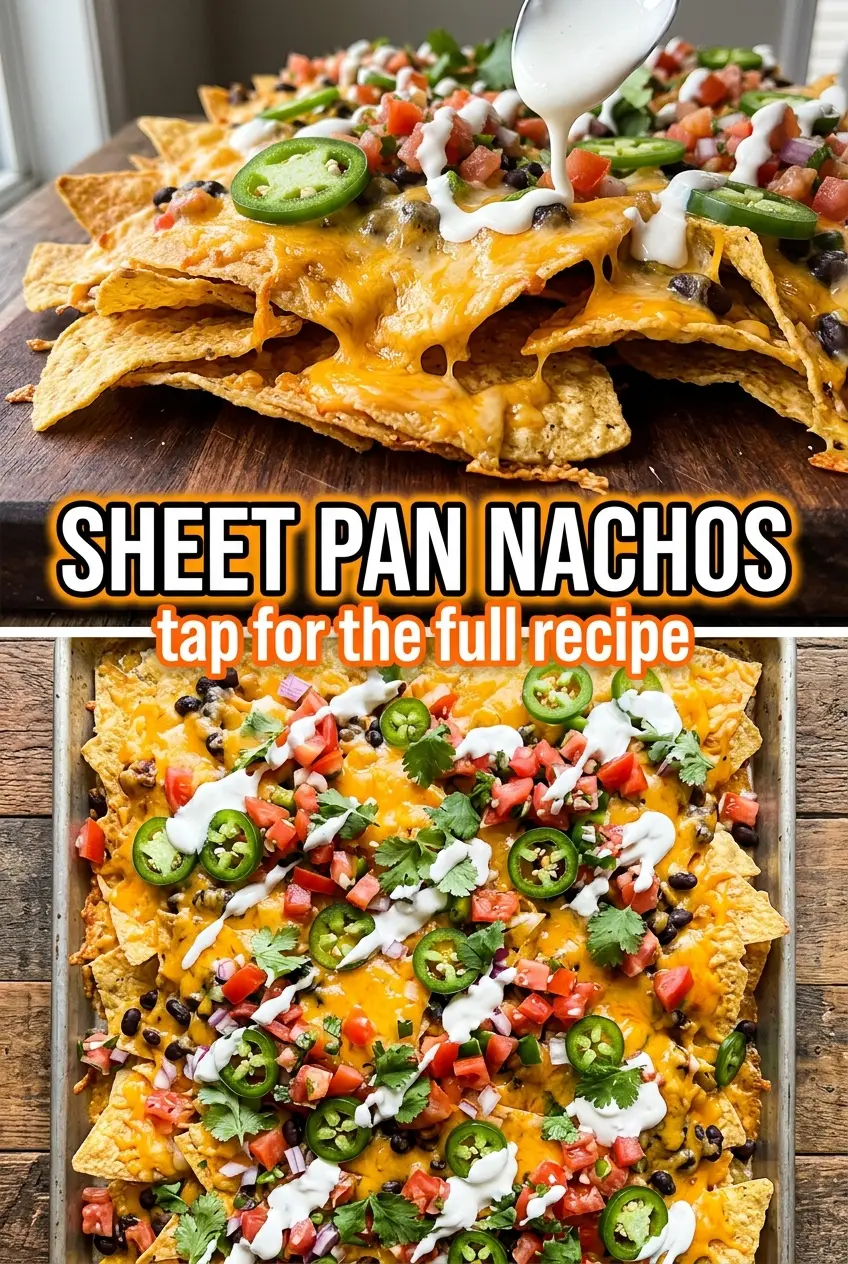
Golden sheet pan nachos work because every chip gets a real shot at the good stuff. You get crisp edges, melted cheese in every pocket, and toppings that stay balanced instead of sliding into one soggy pile in the middle. The whole tray comes out bubbling and loud, which is exactly what nachos should do when they hit the table.
The trick is layering in a way that protects the chips while still giving you that loaded look. A first layer of cheese helps anchor the toppings, and a second layer on top melts everything together so the chips underneath don’t stay naked. Using already-cooked meat and drained beans keeps the bake short, which matters because nachos go from perfect to limp fast if they sit in the oven too long.
Below, I’ve included the timing that keeps the chips crisp, plus a few smart swaps for making these work with beef, chorizo, or a vegetarian version without losing the texture that makes sheet pan nachos worth making.
The cheese melted into every layer and the chips at the edges stayed crisp instead of getting soft. I used chorizo, and the jalapeños with the lime at the end gave it the perfect kick.
Save these sheet pan nachos for game night, because the layered cheese-and-chip method keeps every bite loaded and crisp.
The Layering Trick That Keeps the Chips Crisp
Most sheet pan nachos fail because everything gets dumped on top of a single mound of chips. The chips underneath steam, the chips on the edges dry out, and by the time the cheese melts, half the pan has gone soft. Spreading the chips in a true single layer is the first line of defense, but the real fix is in how you distribute the toppings.
Put some cheese down before the heavier toppings, then finish with more cheese on top. That sandwiching effect helps glue the fillings to the chips instead of letting them roll off when you scoop. If you’ve ever had a tray where the first chip was loaded and the next five were empty, this is the difference between that mess and a pan that eats like a plan.
Using cooked meat and drained beans also keeps excess moisture out of the pan. Wet toppings belong after the bake, not before it.
What Each Ingredient Is Actually Doing in This Dish
The ingredient list is short, but each part has a job. If you understand that job, it’s easier to swap things without wrecking the texture.
- Tortilla chips — Thick, sturdy chips hold up best here. Thin chips break under the weight of the toppings and turn soft faster. If you’re choosing between a fancy thin chip and a plain sturdy one, take the sturdy one.
- Cheddar cheese — Cheddar melts well and gives you that classic sharp, salty pull. A pre-shredded bag works fine, though freshly shredded cheese melts a little smoother because it doesn’t carry the anti-caking coating. If you want extra stretch, swap in part Monterey Jack.
- Ground beef or chorizo — This is where the nachos become a meal. Beef gives a milder, savory base, while chorizo brings smoke, spice, and a little oil that seasons the whole tray. Drain off excess fat if your chorizo renders a lot, or the chips at the bottom will go greasy before the cheese melts.
- Black beans — These add heft without making the tray heavy. Drain them well, and if they’re very wet, pat them with a paper towel before scattering them over the chips.
- Jalapeños and red onion — These give the baked nachos a sharp, fresh bite that keeps the cheese from tasting flat. Slice the onion finely so it softens just enough in the oven instead of staying harsh and crunchy.
- Sour cream, salsa, cilantro, avocado, and lime — These belong after baking. Heat would dull the cilantro, split the sour cream, and make the avocado sad. The lime at the end wakes everything up and keeps the tray from tasting heavy.
The 12 Minutes That Decide Whether These Nachos Stay Good
Build the Tray Before the Oven Heats the Chips
Line the sheet pan with foil and spread the chips into a single layer before anything else goes on top. Once you start adding cheese and toppings, you want the tray moving straight into the oven so the chips don’t sit around and absorb steam. Overcrowding is the fastest way to get a soggy center, so if your pan looks piled up, use a second tray instead.
Anchor the Toppings With Cheese
Scatter half the cheese over the chips, then add the beef, beans, jalapeños, and onion. Finish with the rest of the cheese. That top layer is what melts into the gaps and holds the toppings in place, and it also protects the fillings from drying out while the chips underneath stay crisp longer.
Pull Them When the Cheese Is Fully Melted
Bake at 400°F for 10 to 12 minutes, just until the cheese is melted and bubbling. Don’t chase browning here; nachos need a short bake, not a long roast. If the edges of the chips start looking too dark before the cheese is melted, the tray is too close to the heating element or it has been in the oven too long.
Finish Cold and Fast
Add the sour cream and salsa the second the tray comes out. If you wait, the residual heat keeps steaming the chips, and that’s when the crisp texture starts fading. Cilantro, avocado, and lime go on last so they stay bright and fresh against all that melted cheese.
How to Adapt These Nachos for Different Crowds and Diets
Make It Vegetarian Without Losing the Heft
Skip the beef or chorizo and add extra black beans, then scatter on a little more cheese so the tray still feels substantial. You can also add roasted corn or diced bell pepper after baking for more texture. The result is lighter, but it still eats like a proper platter, not a compromise.
Use Chorizo When You Want More Flavor in the Pan
Chorizo brings spice and seasoning that spread across the whole tray as it bakes. If it releases a lot of grease, drain it well before you add it so the chips don’t go soft. This is the version to use when you want a bolder, smokier result without adding extra sauces.
Gluten-Free Is Already Built In
Most tortilla chips are naturally gluten-free, but check the bag if you’re serving someone who needs to avoid cross-contact. The rest of the ingredients in this version are naturally gluten-free as well, so the main job is choosing a chip that holds up and fits your needs.
Stretch It for a Bigger Party
For a crowd, use two sheet pans instead of one overloaded tray. The chips need space for air to move around them, or the bottom layer steams before the top layer finishes melting. Two thinner trays beat one giant mound every time.
Storage and Reheating
- Refrigerator: Leftovers keep for 2 days, but the chips soften as they sit.
- Freezer: These don’t freeze well once assembled. The chips and sour cream change texture too much.
- Reheating: Scrape off any cold toppings, then reheat the cheesy chip base on a sheet pan in a 375°F oven until warmed through. Adding the fresh toppings after reheating keeps the texture closer to the original.
Questions I Get Asked About This Recipe
Sheet Pan Nachos
Ingredients
Equipment
Method
- Preheat the oven to 400°F and line a large sheet pan with foil.
- Arrange tortilla chips on the prepared sheet pan in a single layer.
- Scatter cooked ground beef, black beans, and half of the shredded cheddar cheese over the chips.
- Top with remaining cheddar cheese and scatter diced jalapeños and diced red onion on top.
- Bake for 10-12 minutes at 400°F until cheese is melted and bubbly.
- Remove from the oven and immediately dollop with sour cream and salsa.
- Garnish with fresh cilantro and avocado slices.
- Serve with lime wedges and additional salsa and sour cream on the side.