
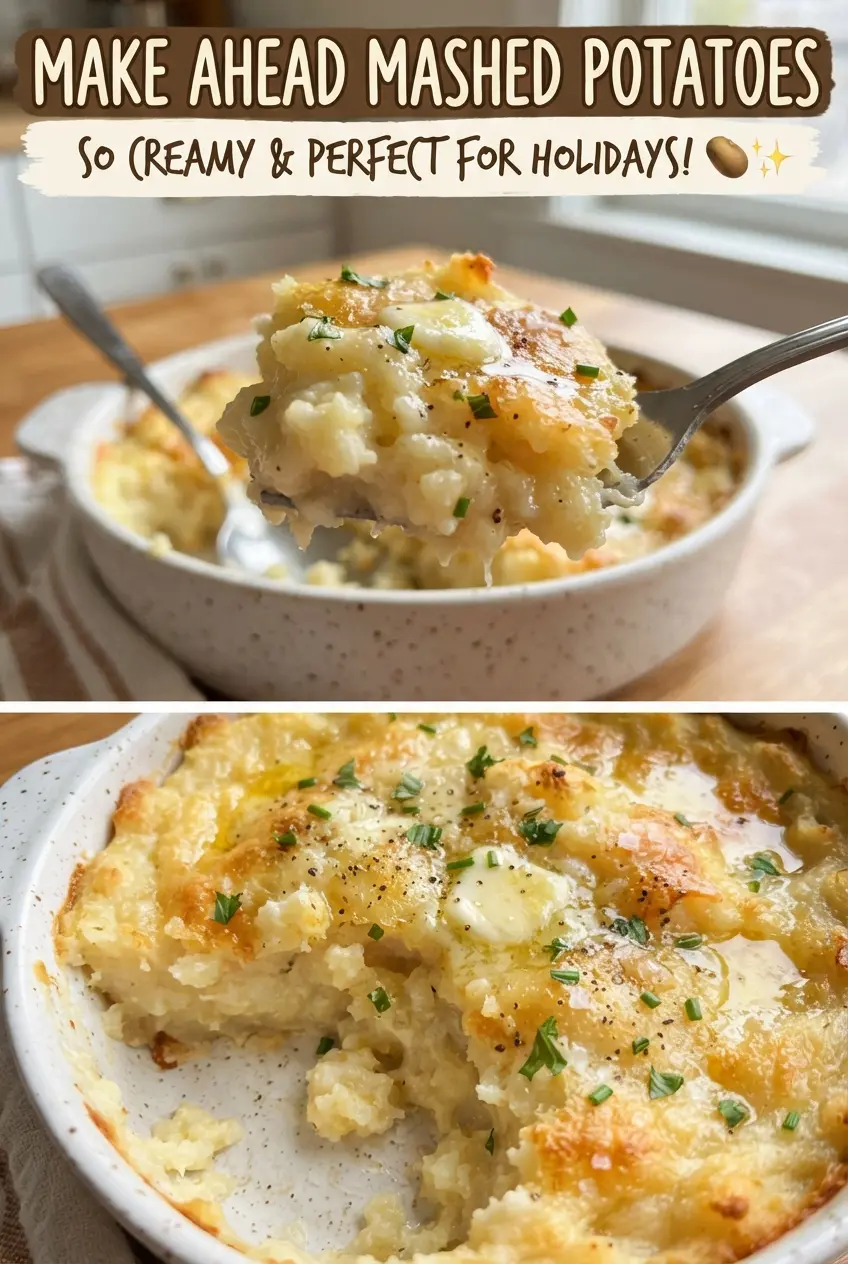
Make-ahead mashed potatoes earn their keep the second a holiday table gets crowded. They stay creamy after reheating, hold their shape in a baking dish, and still taste like someone stood over the pot and stirred in the butter at the last minute. The baked top gives you a little contrast too — soft and rich underneath, with those browned edges and melted butter on top that people always scoop first.
The trick is building enough fat and dairy into the potatoes before they go into the fridge. Yukon golds mash into a naturally buttery texture, and cream cheese helps the whole dish reheat without turning loose or watery. Warm milk matters here, because cold liquid slows everything down and makes the mash harder to smooth out. The result is a casserole-style side that can sit quietly in the fridge, then come back to the oven looking like it was made that day.
Below, I’ll walk through the part that matters most: how to keep the potatoes fluffy instead of gluey, plus the best way to reheat them so the center gets hot before the top dries out.
The potatoes reheated beautifully and stayed creamy all the way through, and the top baked up with just enough golden color. I made them the day before Thanksgiving and had zero stress at dinner.
Make-ahead mashed potatoes with a creamy center and golden baked top are perfect when you want the side dish done before guests arrive.
The Part That Keeps These Potatoes Creamy After a Night in the Fridge
The biggest mistake with make-ahead mashed potatoes is treating them like a fresh bowl of mash. Once potatoes chill, they tighten up, and if they don’t have enough fat and dairy mixed in from the start, they bake up dry and a little grainy. Cream cheese is what keeps this version stable. It gives body without making the potatoes heavy, and it helps the dish hold together in the oven instead of turning slack around the edges.
The other detail that matters is the way you mash them. Boiled potatoes need to be fully drained before anything else goes in, or you trap extra water in the bowl and end up with a loose casserole. A potato masher gives you the best control here. A food processor will make them stretchy, and that texture only gets worse after they sit overnight.
- Yukon gold potatoes — These are the right potato for a smooth, buttery mash that still feels substantial. Russets work, but they dry out faster and can taste a little fluffier than you want in a make-ahead side.
- Cream cheese — This is the insurance policy. It adds structure and keeps the potatoes from separating when they’re reheated. Full-fat cream cheese works best here.
- Sour cream — It brings tang and a softer finish so the potatoes don’t taste flat after baking. Plain Greek yogurt can work in a pinch, but the flavor is sharper and the texture is less plush.
- Warmed milk — Warm milk blends in smoothly and doesn’t cool down the potatoes right away. Cold milk can make the mash tighten before you’ve finished mixing.
Building the Mash So It Reheats Like It Was Made Fresh

- Boiling the potatoes — Start them in well-salted water and cook until a fork slips through with no resistance, 15 to 18 minutes. If they’re still firm in the center, the mash ends up lumpy no matter how long you stir. Drain them well and let the steam escape for a minute or two so extra water doesn’t get trapped in the pan.
- Mashing with the dairy — Add the cream cheese, sour cream, butter, and warm milk while the potatoes are still hot. That’s when they absorb everything evenly. Stir just until smooth. If you keep working them after they look combined, they can turn gummy.
- Baking the day of serving — Spread the potatoes into a buttered 9×13-inch dish and dot the top with the remaining butter. Cover tightly for the first part of baking so the center heats through before the top dries out. If you uncover them too early, the surface sets before the middle is hot enough.
- Finishing the top — The last uncovered bake gives you the lightly browned edges and creamy crust that make this dish feel finished. A little paprika and chives add color, but they also tell the eye that the potatoes are hot and ready to serve.
Three Ways to Use This Recipe for Different Dinners
Dairy-Free Version
Use a plant-based cream cheese, dairy-free sour cream, and unsweetened oat milk or cashew milk. The potatoes will still be creamy, but the flavor will be a little less tangy and the finish won’t brown quite the same way. Add a bit more salt at the end, since dairy-free substitutes often need a stronger hand with seasoning.
Extra-Garlicky Mashed Potatoes
Swap the garlic powder for 3 to 4 cloves of roasted garlic mashed into the potatoes. This gives you a sweeter, deeper garlic flavor than the powder alone. It’s a better fit when the potatoes are serving alongside roast chicken or steak.
Make-Ahead Holiday Timing
Assemble the dish up to 2 days ahead and keep it tightly covered in the fridge. If the potatoes go into the oven straight from cold, the center stays chilly while the top dries out, so let the dish sit at room temperature for 30 minutes before baking. That short rest makes the whole casserole heat evenly.
Smaller Weeknight Batch
Cut everything in half and bake it in an 8×8-inch dish. The texture stays the same, but the reheating time drops a little, which is handy for a smaller dinner. Keep the covered bake time first, then uncover only long enough to warm and lightly color the top.
Storage and Reheating
- Refrigerator: Store covered for up to 2 days. The surface may firm up a little, but the potatoes stay creamy once reheated.
- Freezer: Freezing isn’t my first choice for this dish. The dairy can separate a little after thawing, and the texture is never quite as smooth as fresh or refrigerated potatoes.
- Reheating: Bake covered at 350F until the center is hot, then uncover for the last stretch so the top can dry slightly and brown. The most common mistake is blasting them uncovered the whole time, which dries out the edges before the middle catches up.
Questions I Get Asked About This Recipe
Make Ahead Mashed Potatoes
Ingredients
Equipment
Method
- Bring a Dutch oven of salted water to a boil, then add the peeled and cubed Yukon gold potatoes and cook until tender, 15-18 minutes. Visual cue: a fork should slide in easily with little resistance.
- Drain the potatoes thoroughly in a colander so excess water doesn’t make the mash loose. Visual cue: shake the strainer gently for 10 seconds to remove surface steam.
- Mash the hot potatoes with softened cream cheese, sour cream, 6 tablespoons of the divided butter, and warmed whole milk until smooth. Visual cue: the mash should look glossy and uniform with no visible lumps.
- Season the mash with garlic powder, 1 1/2 teaspoons salt, and black pepper, stirring until evenly distributed. Visual cue: specks of black pepper should be evenly spread throughout.
- Spread the mashed potatoes into a buttered 9x13-inch baking dish and dot the top with the remaining butter. Visual cue: the surface should be level and the butter dots should be visible.
- Cover tightly and refrigerate up to 2 days. Visual cue: foil should be snug with no gaps to prevent drying out.
- Remove from the refrigerator and let sit at room temperature for 30 minutes before baking. Visual cue: the dish should look slightly warmer and less firm at the edges.
- Bake covered at 350F for 30 minutes, until hot throughout. Visual cue: steam should lift under the foil when you lift one corner.
- Bake uncovered at 350F for 15-20 minutes until hot and golden on top. Visual cue: the surface should develop golden patches rather than remaining pale.
- Sprinkle the top with paprika and chives, then serve immediately. Visual cue: garnish should look fresh and bright against the golden surface.


