
Golden-skinned chicken thighs tucked into a Parmesan cream sauce are the kind of dinner that disappears fast because the whole pan hits the table with contrast: crisp, savory chicken on top, silky sauce underneath, and little bursts of sun-dried tomato in every bite. The spinach melts into the cream without turning the dish heavy, and the basil at the end keeps it from feeling flat.
What makes this version work is the sear. Browning the thighs skin-side down first gives you flavor and a head start on rendering the fat, which keeps the skin from going rubbery in the oven. The sauce also stays stable because the broth loosens the browned bits before the cream and Parmesan go in. That order matters. If you dump cheese into a pan that’s too hot, it can turn grainy or clump instead of melting into a smooth sauce.
Below, I’ve included the little details that keep the sauce creamy, the chicken crisp, and the whole pan tasting like it came from a restaurant kitchen instead of a rushed Tuesday night.
The chicken skin stayed crisp even after baking, and the sauce thickened up beautifully without breaking. My husband kept spooning the extra sun-dried tomato sauce over everything on his plate.
Save this Baked Tuscan Chicken for nights when you want crisp chicken thighs, a creamy Parmesan sauce, and a skillet dinner that looks as good as it tastes.
The Sear Is What Keeps the Chicken From Going Soft
The biggest mistake with a baked chicken skillet like this is rushing the first step and thinking the oven will do the rest. It won’t. If the thighs don’t get a deep golden crust in the skillet, they can bake up pale and the skin can lose its texture once it hits the sauce. The sear also leaves browned bits in the pan, and those are what give the sauce its depth.
Skin-side down should stay put until the fat renders and the skin releases easily. If it sticks, it needs another minute. Flipping too early tears the skin, and once that happens, you lose both color and crunch. The chicken doesn’t need to be cooked through at this stage; it just needs a strong head start and a good color on both sides.
- Let the skillet get hot before the chicken goes in. Olive oil should shimmer, not smoke heavily. That first blast of heat helps the skin tighten and brown instead of steaming.
- Don’t crowd the pan. If the thighs are jammed together, they release moisture and slow the browning.
- Use the rendered fat. A little of that chicken fat left in the skillet helps the garlic and tomatoes bloom without needing extra butter.
What Each Ingredient Is Actually Doing in This Pan
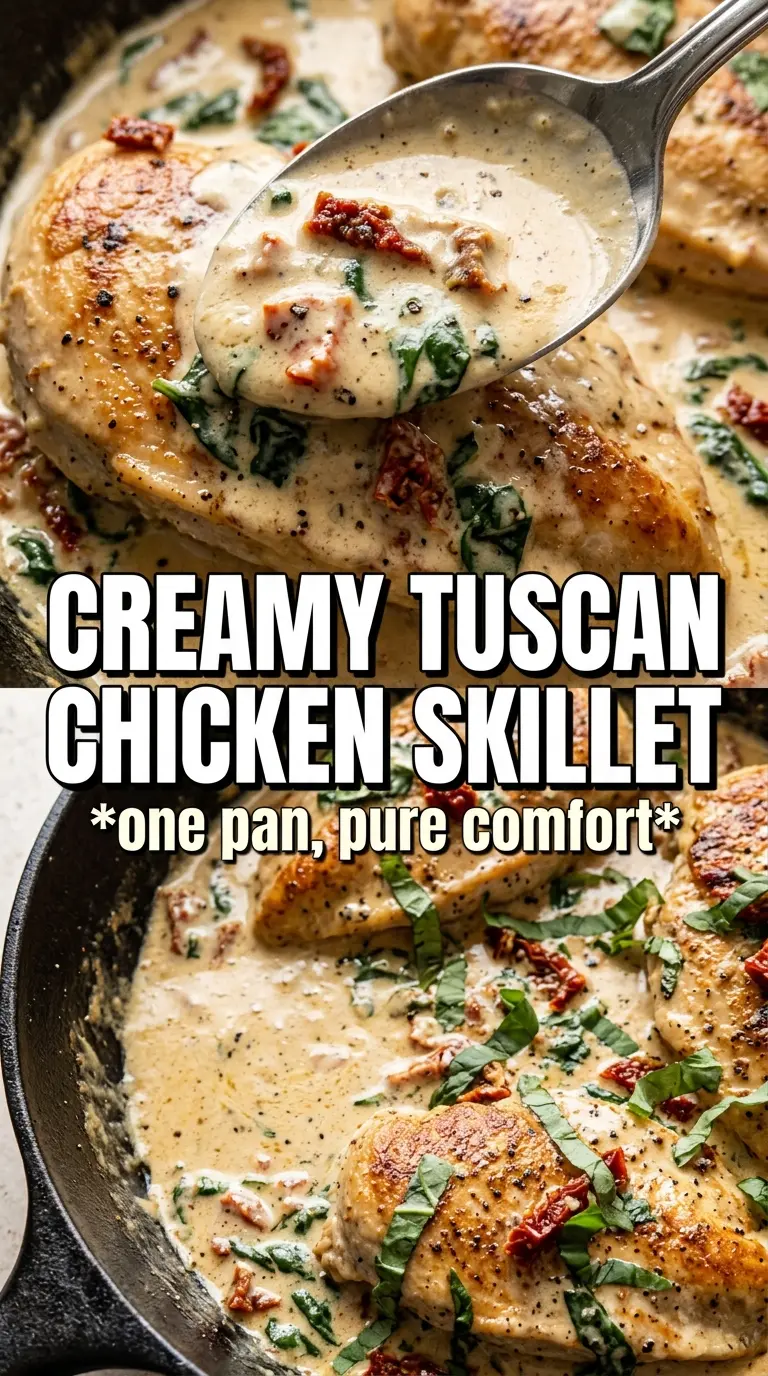
- Bone-in, skin-on chicken thighs — These stay juicy in the oven and give you the best texture because the skin crisps before the meat finishes cooking. Boneless thighs will work, but you lose some of that rich pan-roasted flavor and the bake time drops.
- Sun-dried tomatoes in oil — They bring concentrated sweetness and acidity that cuts through the cream. The oil-packed kind stay softer and more flavorful than dry-packed tomatoes, which need extra soaking.
- Heavy cream — This is what keeps the sauce silky. Half-and-half can work in a pinch, but it’s easier to curdle and won’t cling to the chicken the same way.
- Parmesan cheese — Grate it fresh if you can. Pre-shredded Parmesan often has anti-caking agents that can make the sauce a little grainy instead of smooth.
- Fresh baby spinach — It looks like a lot at first, then collapses fast into the sauce. Add it at the end so it stays bright and doesn’t turn muddy.
Building the Sauce Without Losing the Crisp Skin
Season and Sear the Chicken
Season the thighs generously on both sides before they hit the skillet. You want the skin-side down first so the fat can render and the surface can turn deeply golden, about 6 to 7 minutes. If the chicken still clings to the pan, leave it alone; once the crust forms, it releases more cleanly. Pull it out after the second side gets a quick sear, even if the middle is still underdone — the oven finishes that part.
Wake Up the Garlic and Tomatoes
Garlic goes in only after the chicken comes out, and it needs just 30 seconds in the hot pan. Any longer and it can burn, which makes the whole sauce taste sharp. Add the sun-dried tomatoes next and let them cook briefly in the fat so their flavor blooms before the liquid goes in. Then deglaze with chicken broth and scrape up every browned bit from the bottom of the skillet.
Finish the Sauce, Then Bake
Once the broth goes in, lower the heat before adding cream and Parmesan. That lower heat is what keeps the sauce smooth. Stir in the spinach just until wilted, then nestle the chicken back in skin-side up so the top stays above the sauce and can keep its texture in the oven. Bake uncovered until the chicken reaches 165°F and the sauce is bubbling around the edges.
How to Adapt This When You Need a Different Pan or a Lighter Dinner
Use chicken breasts instead of thighs
Chicken breasts will work, but they dry out faster and don’t bring the same rich flavor. Sear them for less time, then bake only until the center reaches 165°F. If they’re thick, pound them slightly so they cook evenly without overbaking the outside.
Make it gluten-free
This dish is naturally gluten-free as long as your broth and Parmesan are certified gluten-free. That’s one of the nice things about skillet dinners like this — the cream sauce does the heavy lifting without needing flour.
Go dairy-light without breaking the sauce
You can swap the heavy cream for full-fat coconut milk and skip the Parmesan if you need a dairy-free version. The sauce won’t taste as sharp or cheesy, but it will still be rich and spoonable. Add a little extra salt and a squeeze of lemon at the end to bring the flavor back into balance.
Turn it into a bigger dinner
For a crowd, double the sauce but keep the chicken in a single layer so the skin stays exposed. If you pile the thighs on top of each other, they steam instead of roast, and you lose the texture that makes this dish worth making.
Storage and Reheating
- Refrigerator: Store leftovers in an airtight container for up to 3 days. The skin softens in the fridge, but the sauce stays flavorful.
- Freezer: The chicken freezes well, but the cream sauce can separate a little after thawing. If you freeze it, expect a less silky texture and rewarm gently.
- Reheating: Reheat covered in a 325°F oven until hot, or warm gently on the stovetop with a splash of broth. High heat is what makes the cream break, so keep the temperature low and steady.
Answers to the Questions Worth Asking

Baked Tuscan Chicken
Ingredients
Equipment
Method
- Preheat oven to 400°F and season chicken thighs generously with salt, pepper, garlic powder, Italian seasoning, and smoked paprika.
- Heat olive oil in an oven-safe skillet over medium-high heat until shimmering.
- Place chicken skin-side down in the skillet and sear 6-7 minutes until deeply golden.
- Flip and sear 3 more minutes until browned, then remove the chicken to a plate.
- Cook minced garlic for 30 seconds until fragrant.
- Add sun-dried tomatoes and cook 1 minute, scraping up any browned bits.
- Pour in chicken broth to deglaze, stirring until the bottom looks clean.
- Stir in heavy cream, Parmesan, Italian seasoning, and red pepper flakes, then simmer briefly until the sauce thickens slightly and starts to look glossy.
- Stir in baby spinach until wilted and bright green.
- Nestle chicken skin-side up into the sauce so the skin stays visible.
- Bake uncovered 18-20 minutes until the internal temperature reaches 165°F and the Parmesan sauce is bubbling around the chicken.
- Garnish with fresh basil and serve immediately.


